
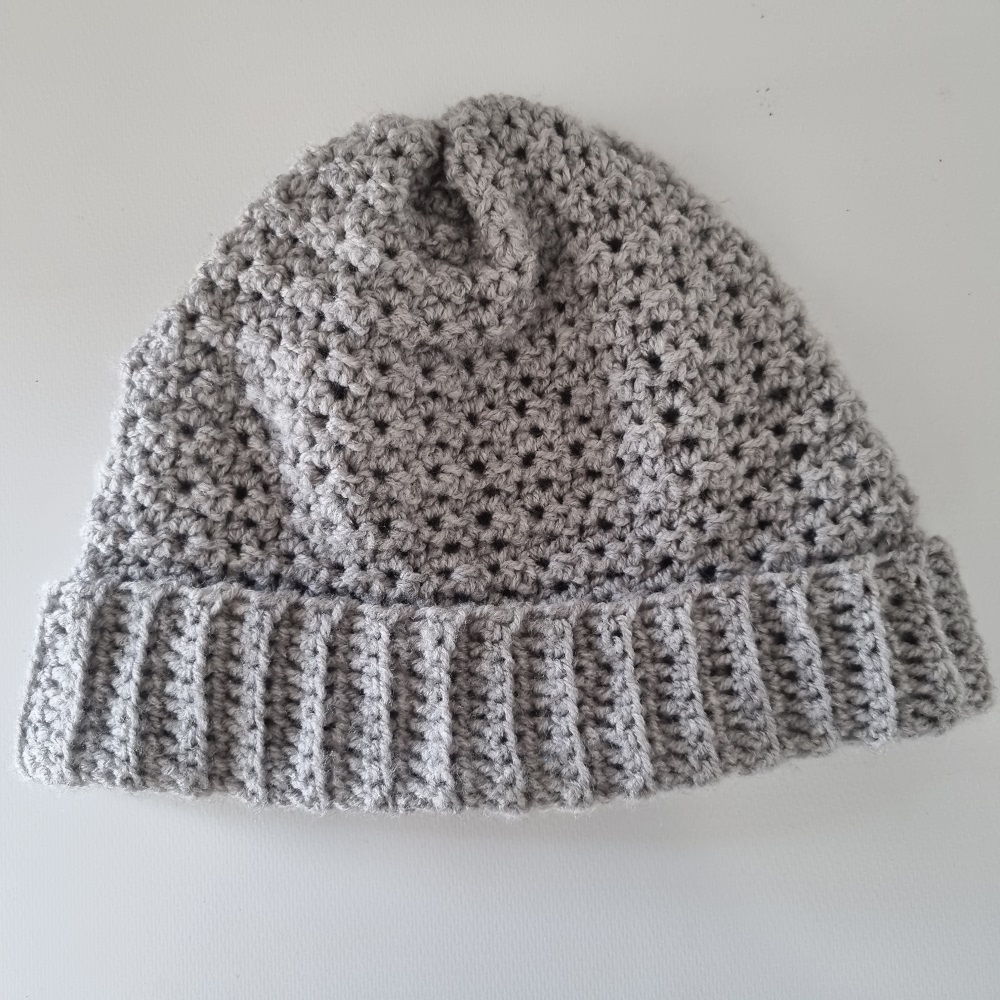
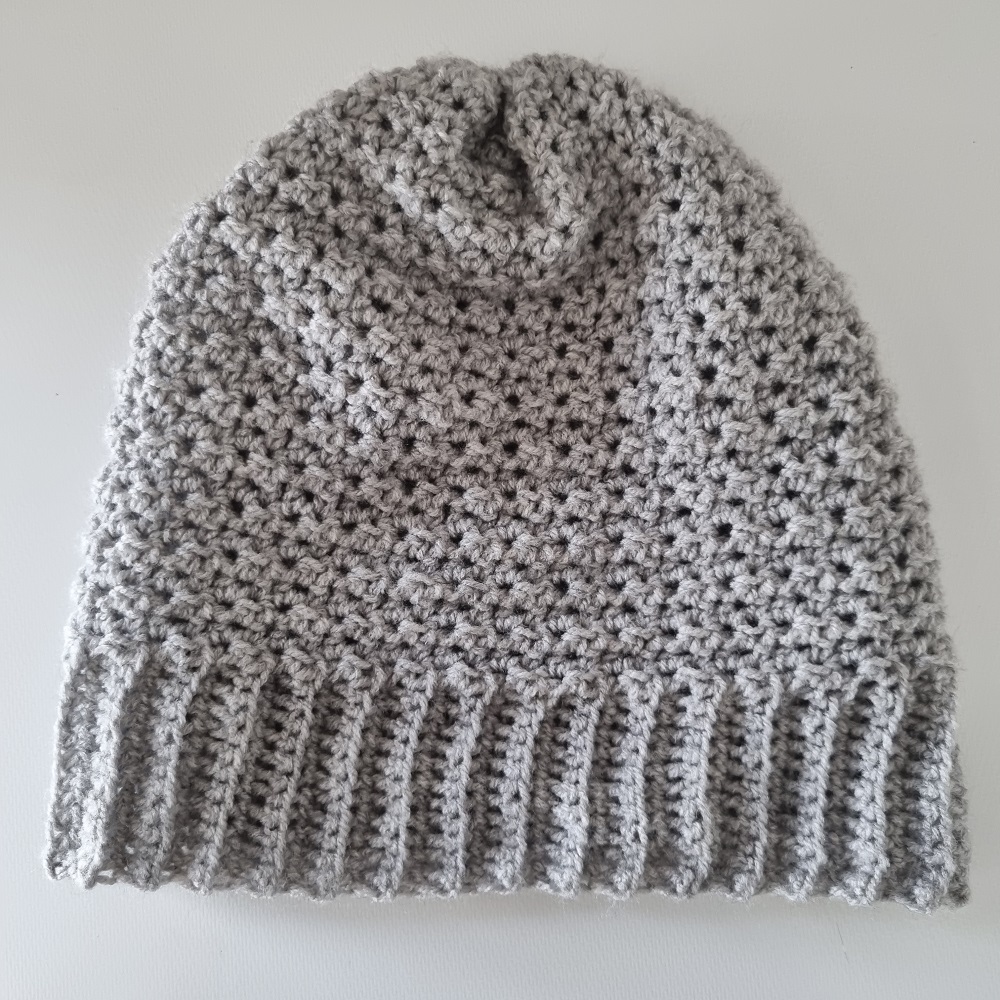
Beanies are by far one of my favorite things to crochet. They’re a quick project to whip up while watching TV, as a mindless thing to do with my hands. Also my head and ears also get cold really easily, so I’ve always got one one!
This faux-chunky beanie is inspired by TLYC’s Kima Cardi, which I’ve been crocheting as Christmas presents for my parents! I thought the stitch pattern would work super well on a beanie, and I definitely made the right choice.
This pattern I’ve written for an Adult medium size head, using 8ply (double knit) yarn and a 6mm hook. This means that it gets worked up really quickly.
*This post may include affiliate links. When you purchase items from these links, we will receive a small commission, at no extra cost to you, to help support this website. Thank you for your support! Read more ->
Something that’s amazing about how this pattern is set up is if you know the circumference of the head you’re making it for, you can easily modify this pattern for any head size, yarn weight, or hook size!
This beanie is a crochet flat and then stitch up the side pattern, making this a very beginner friendly crochet pattern if you’re new! If you’re not new to crocheting, this pattern will be a fun and easy one for when you need a new beanie.
Add this pattern to your notebook on Ravelry!

Modify This Pattern
Some easy modifications for this pattern include: Use a different weight of yarn, make the weave tighter, or make it for a different size head.
If you want to use a different weight of yarn: I suggest going up 2 mm in crochet hook size than what’s recommended for the yarn! This makes it look chunky, and work up much more quickly.
If you want to have a tighter weave: use the suggested size crochet hook for the yarn, and just add more stitches.
Faux-chunky
I’m calling this my faux chunky beanie because with the pattern style and using a hook 2 sizes bigger, it grows really quickly, and looks like you’ve been using a bigger yarn than you actually are!
This has a big ribbing band at the bottom, which also gives it an extra large appearance without actually being extra large.
Read for the US terminology pattern or scroll to the bottom for UK terminology!
Pattern Overview
1 100g 8ply (double knit) acrylic yarn – mine had 300m/100g on the skein (Want to use a different yarn? Figure out how much you’ll need with the yarn calculator!)
(I needed about 60g total, or about 180 meters of yarn total)
6.00 mm crochet hook (US J10)
Darning needle
Stitch marker (optional)
Scissors
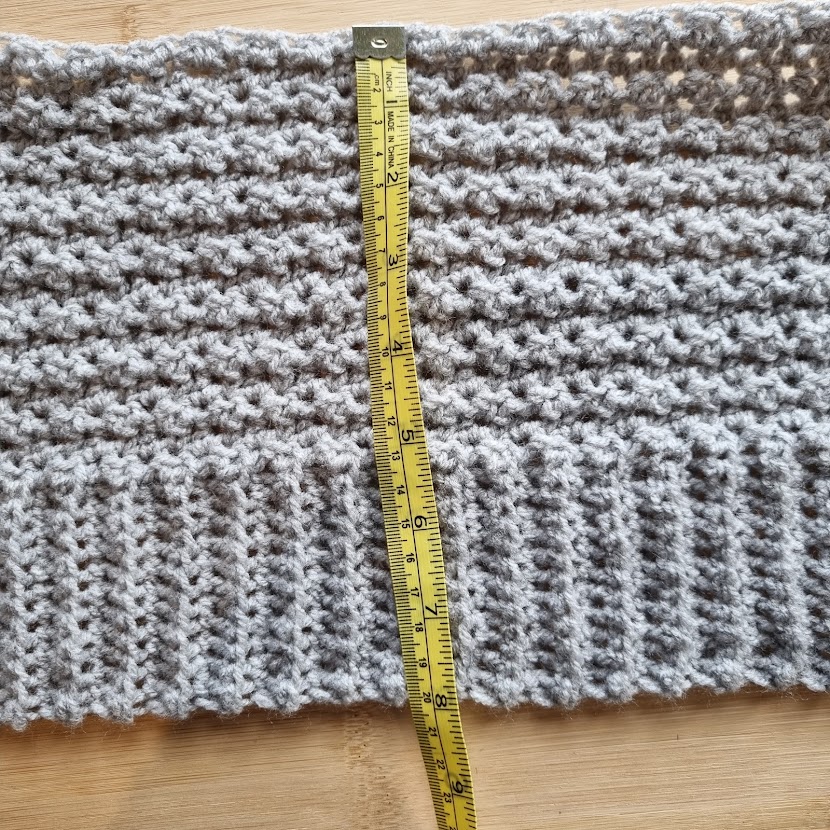
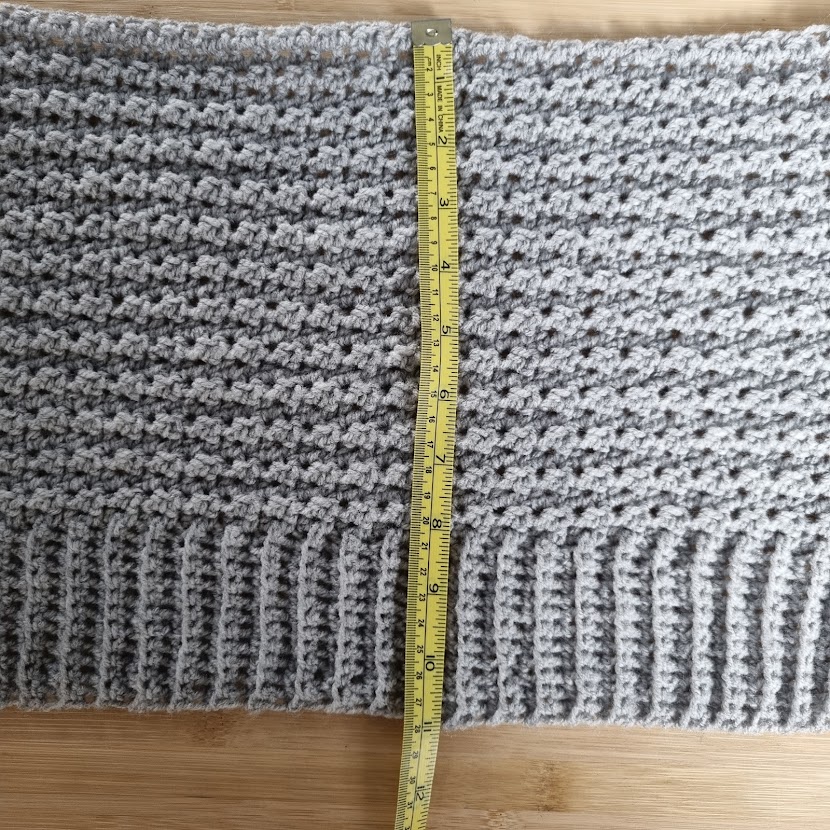
Finished size: adult medium; 22 inch circumference, 8 inches tall (with a 3 inch ribbing fold over)
Gauge: In 2 inch x 2 inches, 7 rows & 7 stitches
Pattern (US terminology)
Terms
Ch = chain
Sc = single crochet
Sc BLO = single crochet in the back loop only
Hdc = half double crochet
Instructions
Start with the ribbing:
Leave a long tail for tying up the hat. If you forget, you’ll just have to add on a new piece of yarn later.
- 1. Chain 13
- 2. Sc starting in second chain from hook, and sc in each stitch to the end (12 sc)
- 3. Chain 1. Sc in BLO across
- 4-66. Repeat row 3 until 66 rows or ribbing reaches 21 inches slightly stretched out, ending in an even number.
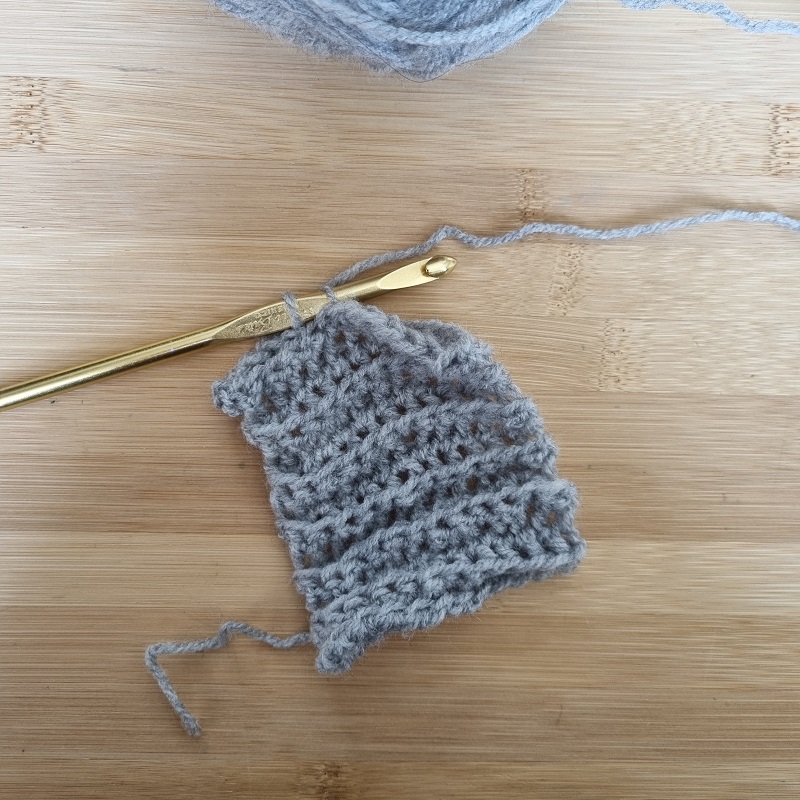
Rotate so you’re working on the side of the ribbing.
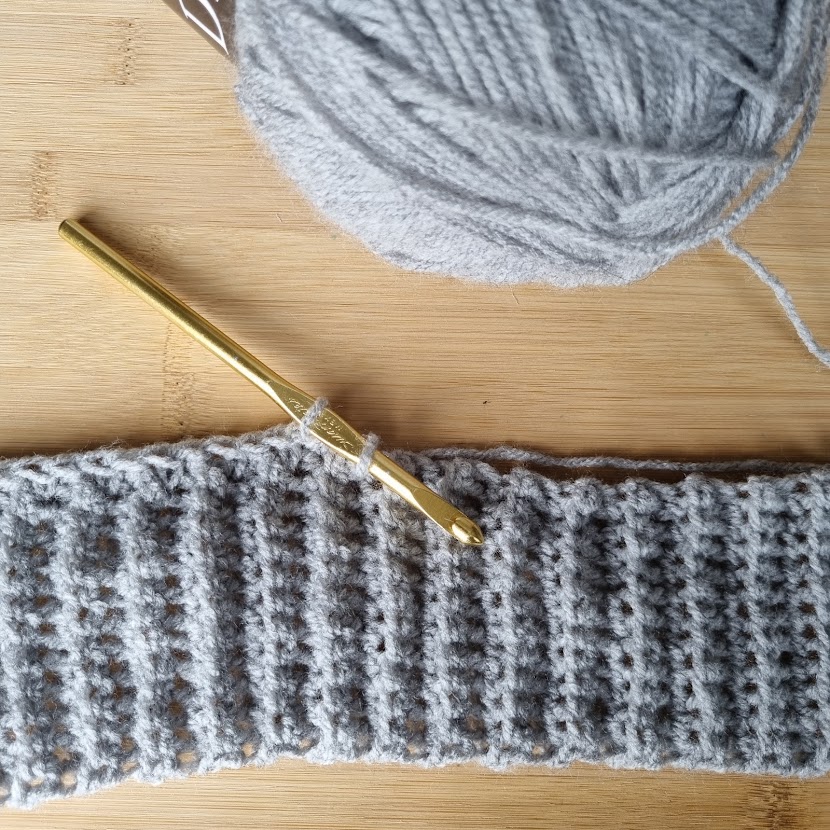
The body of the hat:
- 1. Chain 1. On the side of the ribbing, sc 1, hdc 1 across. Make sure to end in a hdc. (66 stitches across)
- 2. Chain 1. sc 1, hdc 1 across. Make sure the sc is in a hdc from the last row, and the hdc is in a sc. (66)
Repeat row two until either:
- The hat reaches 8 inches including the ribbing (if you don’t want a fold over ribbing)
- The hat reaches 11 inches (3 inch ribbing + 8 inch pattern).
Fasten off the yarn, leaving a long tail for sewing off.
Modify This Pattern
Do you want to use a different weight of yarn or a different hook size or even just make this for a different size head? The key points to know are:
– Make the ribbing 1 inch narrower than the circumference of the size head you’re making the hat for. (Find average head sizes here)
– Ensure that whatever length you do the ribbing for, make sure to end on an even number and end in a hdc on the end of the row.
– Crochet to the right height for the age/size of head you’re making it for! (Find those here).
It’s so easy to modify this pattern to make sure it fits the way you want it to!
Pattern (UK terminology)
Terms
Ch = chain
Dc = double crochet
Dc BLO = double crochet in the back loop only
Htr = half treble crochet
Instructions
Start with the ribbing:
Leave a long tail for tying up the hat. If you forget, you’ll just have to add on a new piece of yarn later.
- 1. Chain 13
- 2. Dc starting in second chain from hook, and dc in each stitch to the end (12 dc)
- 3. Chain 1. Dc in BLO across
- 4-66. Repeat row 3 until 66 rows or ribbing reaches 54 cm slightly stretched out, ending in an even number.
Rotate so you’re working on the side of the ribbing.
The body of the hat:
- 1. Chain 1. On the side of the ribbing, dc 1, htr 1 across. Make sure to end in a htr. (66 stitches across)
- 2. Chain 1. dc 1, htr 1 across. Make sure the dc is in a htr from the last row, and the htr is in a dc. (66)
Repeat row two until either:
- The hat reaches 20 cm including the ribbing (if you don’t want a fold over ribbing)
- The hat reaches 27 cm (7 cm ribbing + 20 cm pattern).
Fasten off the yarn, leaving a long tail for sewing off.
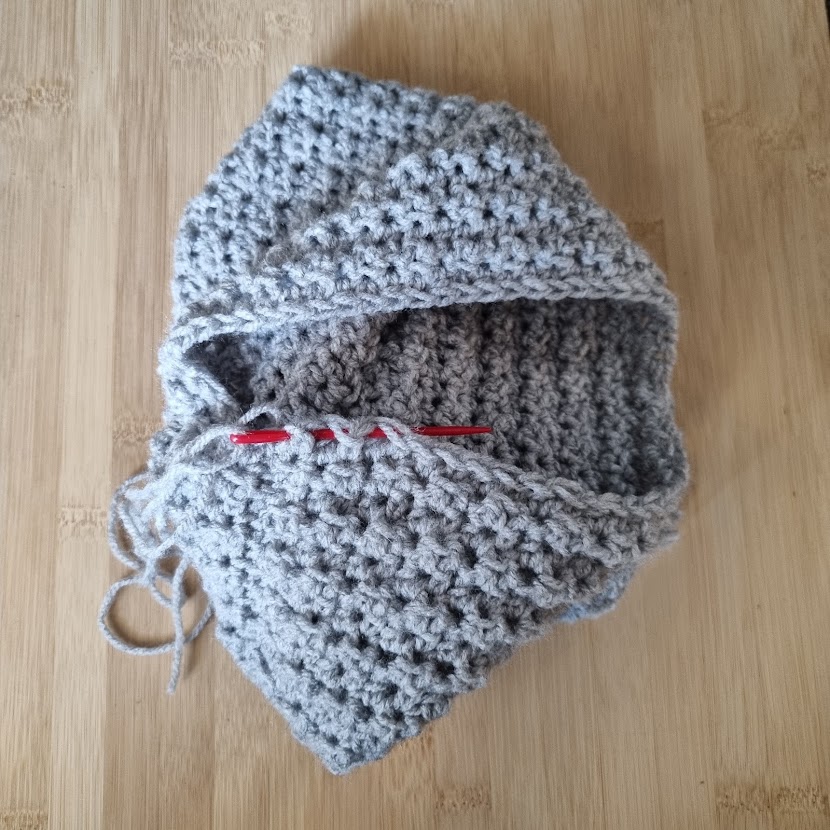
Sew The Hat Together
Use stitch markers or pins to hold the two edges together, making sure the ribbing matches on both sides.
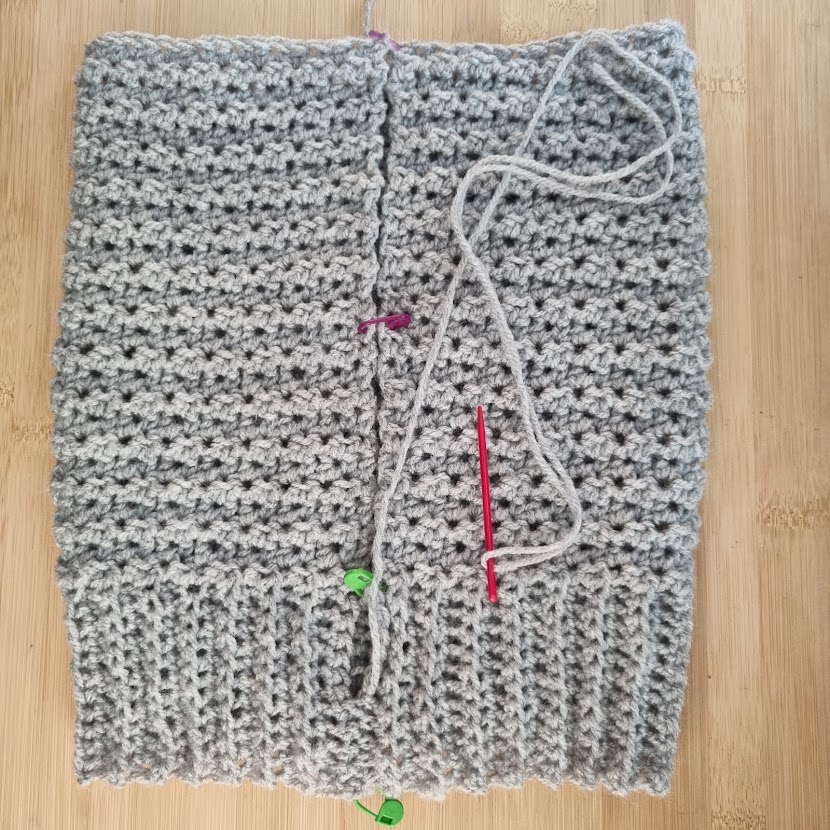
Sew from the bottom up (starting from the ribbing) with your choice of stitch. Tie off. It will now look like a big tube.
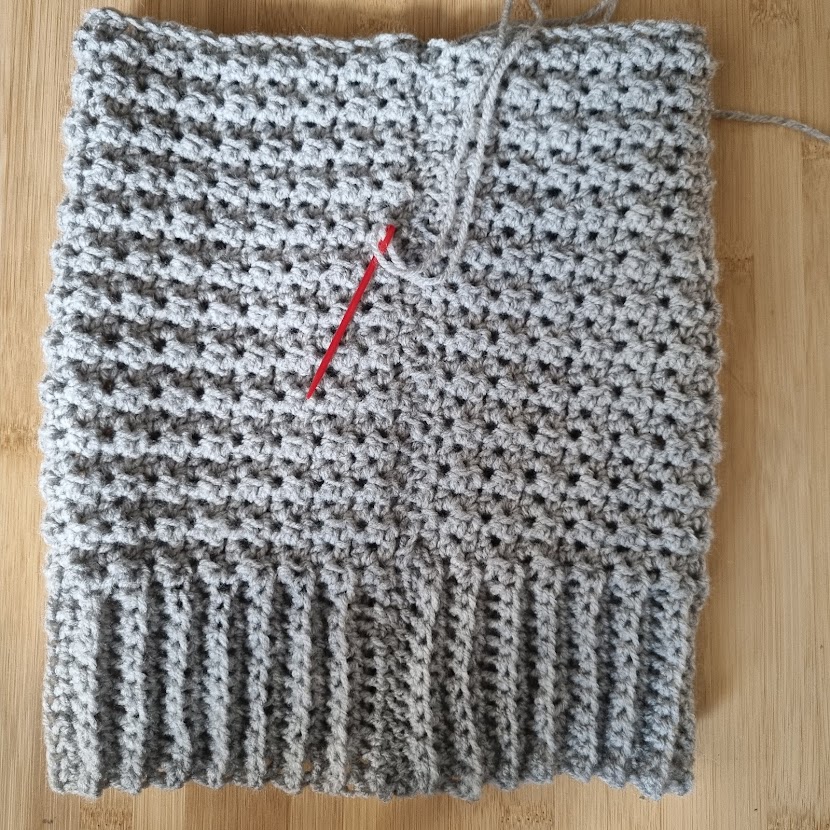
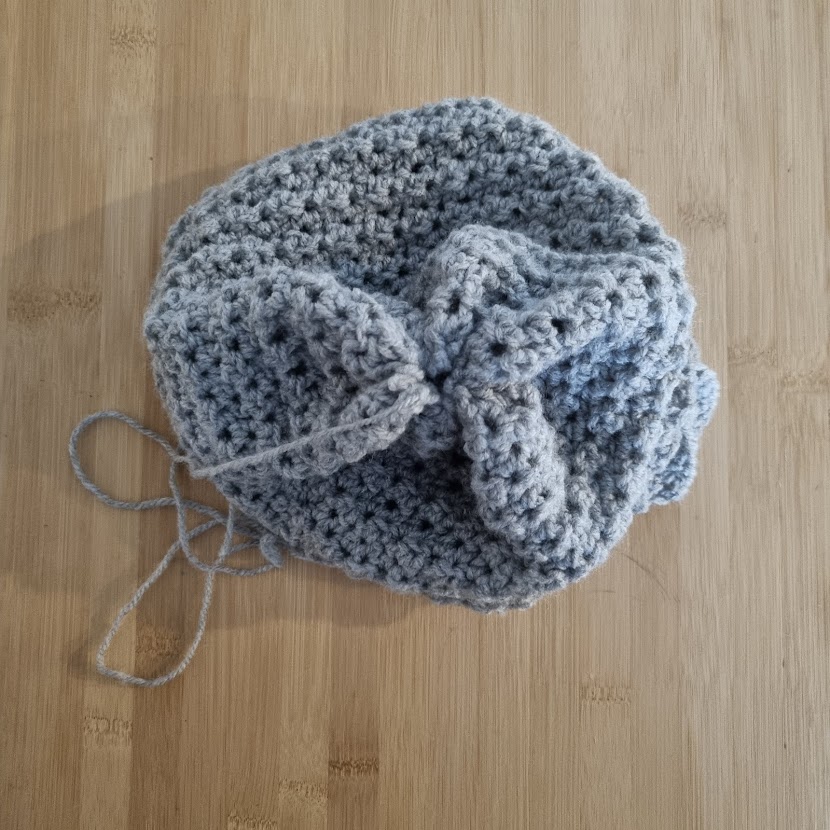
Next, take the other tail and start weaving it between each stitch at the top. Once through all of the stitches, pull the yarn tight. This creates the top of the hat! Tie off as tightly as you can, to ensure the top is closed.
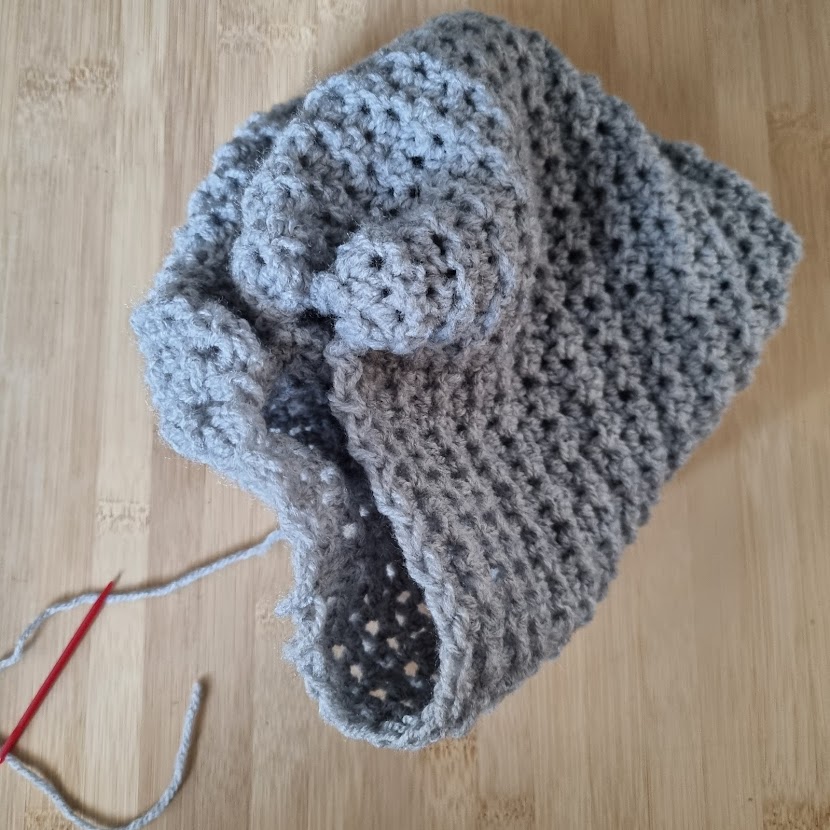
Weave in the ends and block if you need to.
And voila! You have a brand new beanie! This would also look great if you’ve got a pompom on top.
Add this pattern to your notebook on Ravelry!
