
Have you ever had a project that should only take a few days but ends up taking 5 months because you keep not liking how it looks and end up frogging the project over and over? Yeah? Me too.
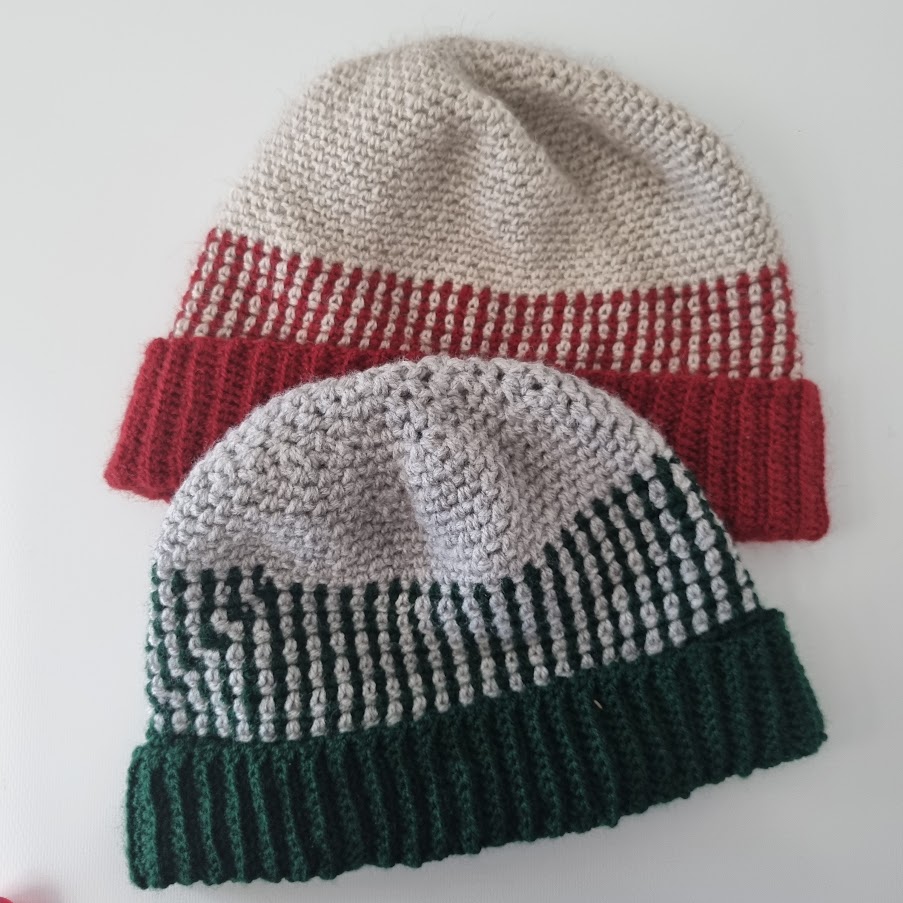
That’s this project – this moss stitch crochet beanie. The first hat I made with this pattern I thought I was going to do an ombre effect with a different stitch; then I thought maybe I try knitting it; and finally came to the conclusion that this hat needed to be made with the moss stitch. Then I made it too big, and then too small, just due to the nature of how the moss stitch works; until finally figured out the right pattern for it!
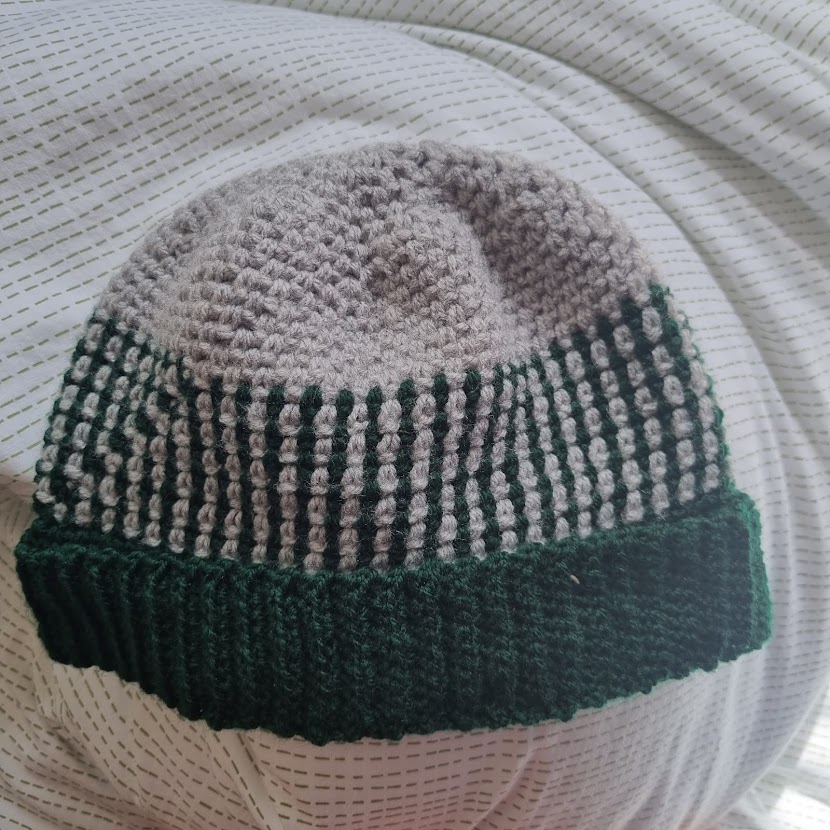
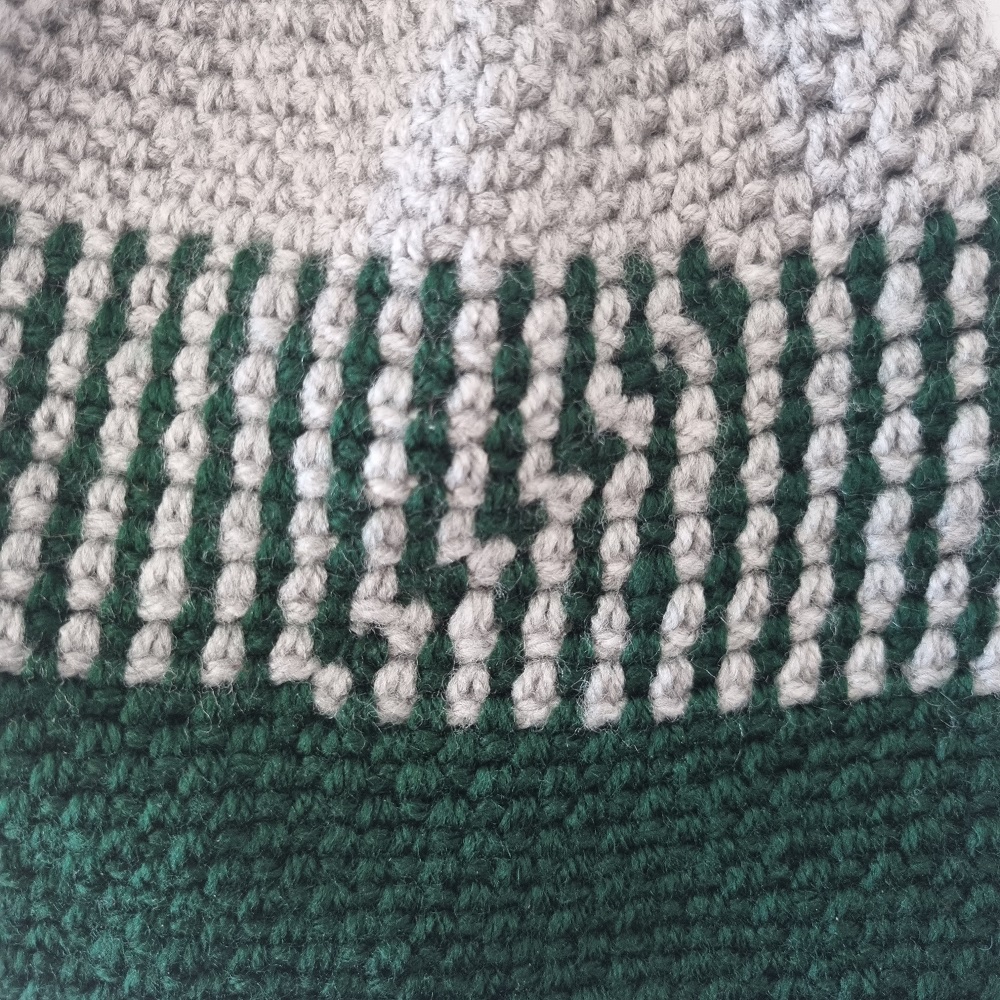
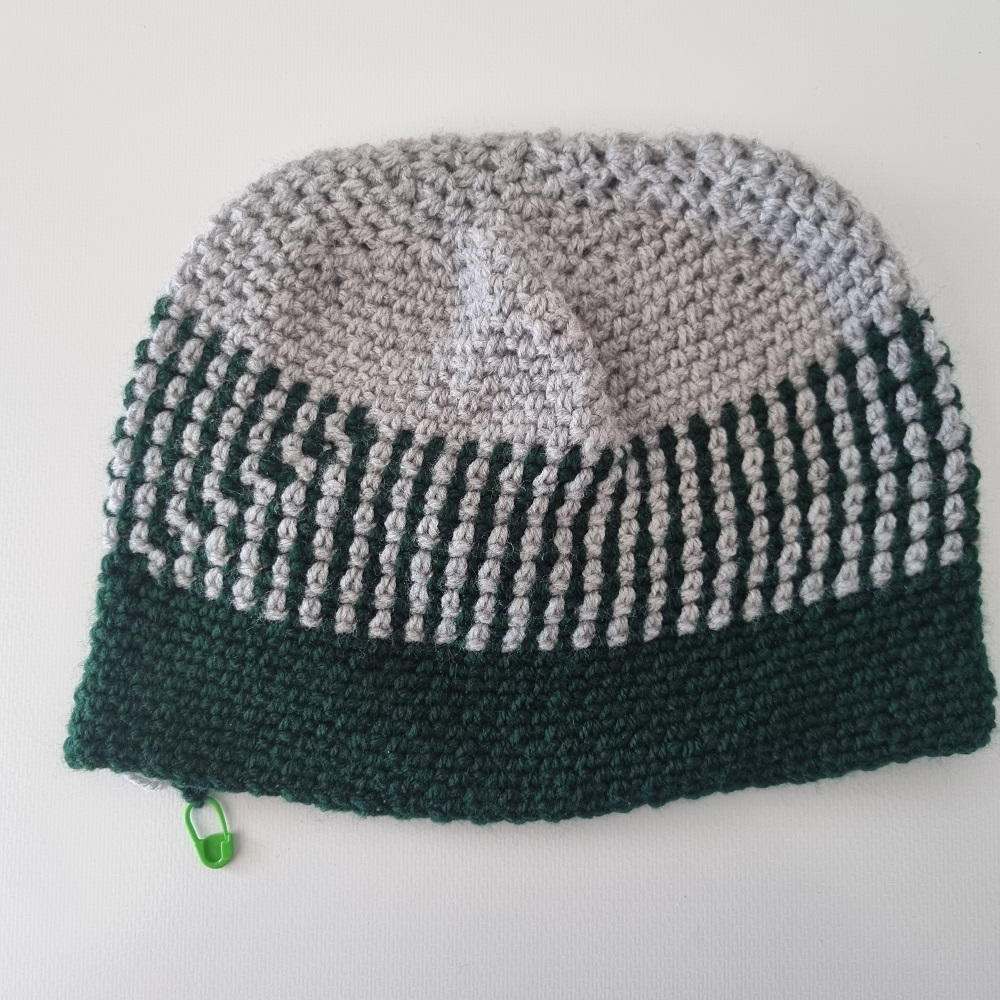
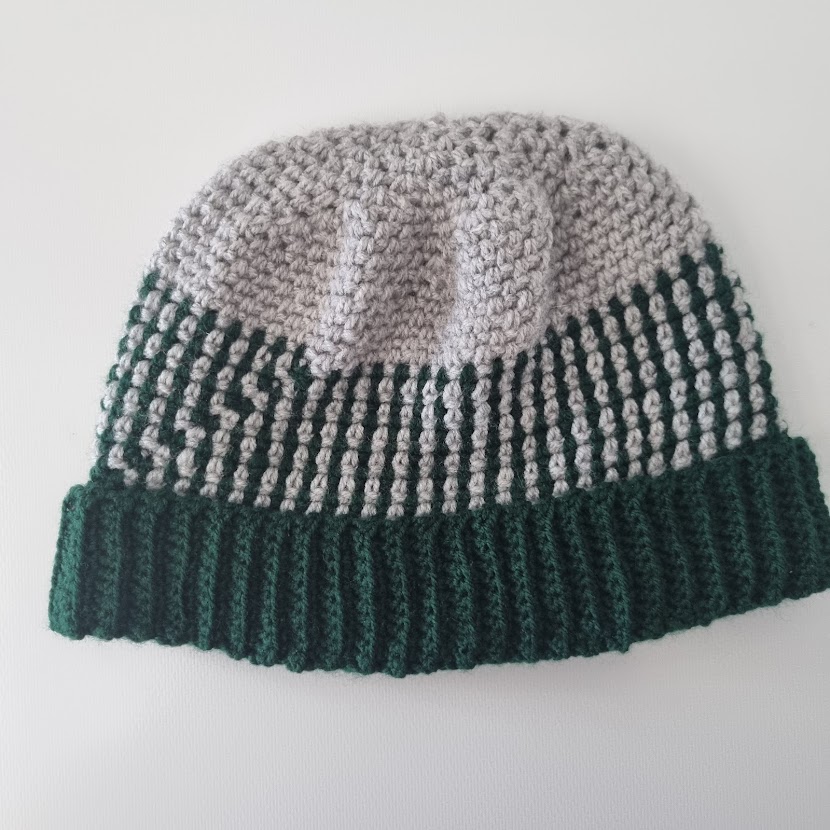
This moss stitch beanie is multi-colored, with a really fun way to incorporate the colors. That’s why it has to be the moss stitch – when you alternate colors each row, it creates this stripe pattern vertically. It’s beautiful and fun and different.
*This post may include affiliate links. When you purchase items from these links, we will receive a small commission, at no extra cost to you, to help support this website. Thank you for your support! Read more ->
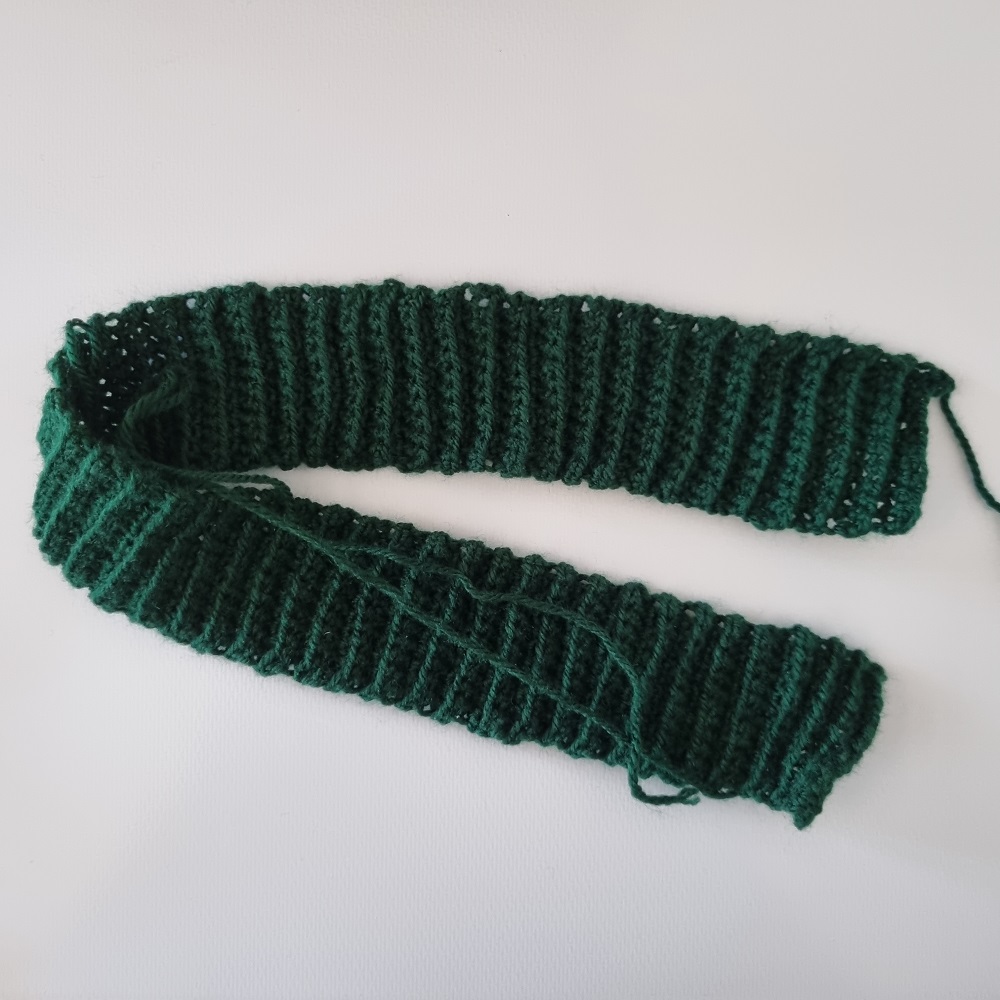
The ribbing is attached on separately at the end, so you can always choose to just skip the ribbing all together if you don’t want it!
Color Changing Moss Stitch Pattern Overview
This moss stitch crochet beanie is worked top down in a continuous round, which makes it really easy to work up! The ribbing is added second, so if you don’t like the look of ribbing, just don’t add it on!
The moss stitch, also called the linen stitch, woven stitch, and granite stitch, is a combination of a single crochet and chain. This means it is a wider stitch so the increase goes a little bit quicker than other stitches.
Try out this stitch in the stash buster pumpkin pattern!
Add this pattern to your notebook on Ravelry!
What You’ll Need
2 colors of yarn, each 50g 8ply (double knit) acrylic yarn, or equivalent – (I’m using a couple discontinued balls of acrylic that have 300m/100g on the skein (Want to use a different yarn? Figure out how much you’ll need with the yarn calculator!)
In the images, I’m calling the grey: color A, and green: color B
My yarn totals I used are 26g (80m) of color A and 37g (120m) of color B
4.00 mm crochet hook (US G6)
Darning needle
Stitch marker!
Scissors
Finished size: adult medium; 22 inch circumference, 8 inches tall (with a 3 inch ribbing fold over)
Gauge (for the moss stitch): 10 stitches and 10 rows in 2 inches (5cm)
Pattern
Terms (US Terminology)
Ch = chain
Sc = single crochet
Sc BLO = single crochet in the back loop only
Inc = increase = 2 moss stitch
Moss stitch crochet = sc1, ch1, the sc is always worked into the chain1 space from the previous row.
*With an increase, in the last row’s chain space there will be: sc1, ch1, sc1, ch1
Terms (UK Terminology)
Ch = chain
Dc = double crochet
Dc BLO = double crochet in the back loop only
Inc = increase = 2 moss stitch
Moss stitch crochet = dc1, ch1, the dc is always worked into the chain1 space from the previous row.
*With an increase, in the last row’s chain space there will be: dc1, ch1, dc1, ch1
Instructions
With Color A
Row 1. Make a magic loop with your first color. In the loop, (sc1, ch1) (UK dc1, ch1) 6 times (moss stitch) (6 moss stitches). Always end in a chain! Use a stitch marker to mark the end of the row.
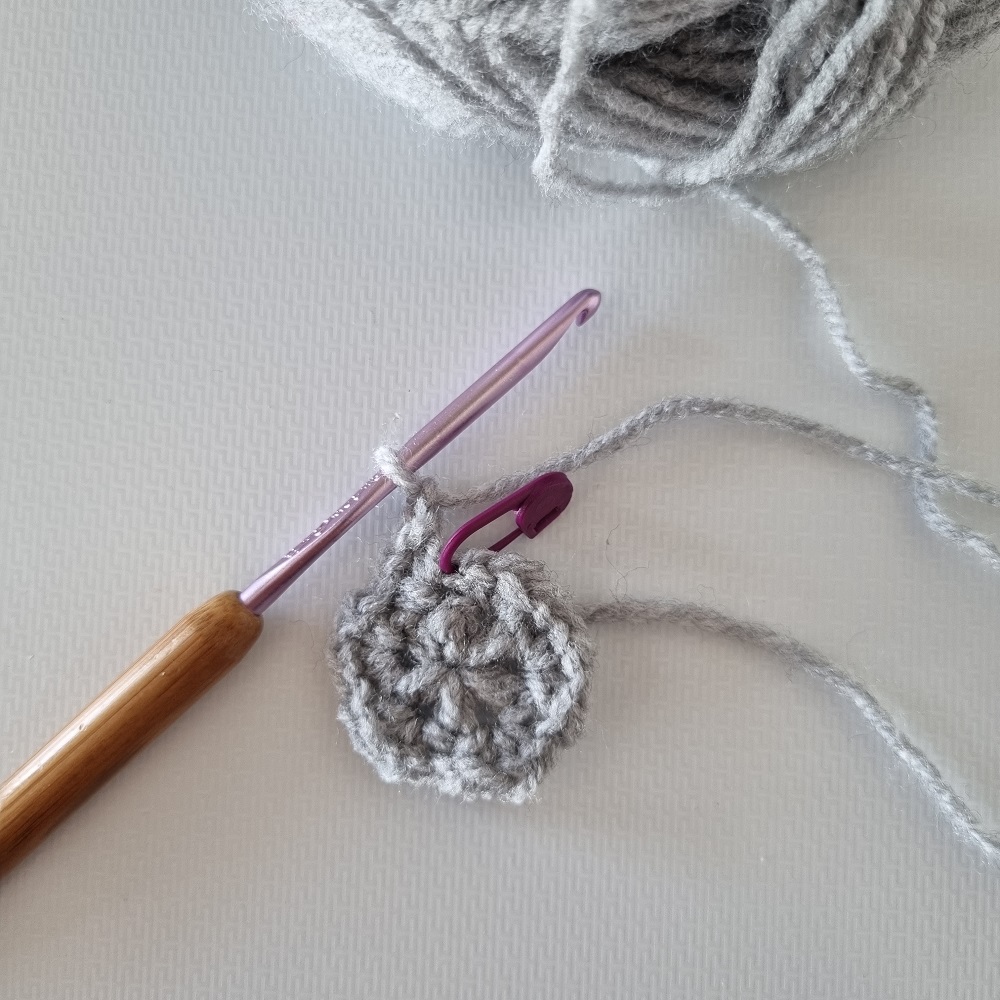
Move the stitch marker at the end of each row.
(This pattern is worked in the round.)
2. Inc around (12 moss stitches)
3. Moss stitch, inc (18 moss stitches)
4. 2 Moss stitch, inc (24 moss stitches)
5. 3 moss stitch, inc (30 moss stitches)
6. 4 moss stitch, inc (36 moss stitches)
7. 5 moss stitch, inc (42 moss stitches)
8. 6 moss stitch, inc (48 moss stitches)
9. 7 moss stitch, inc (54 moss stitches)
(optional row 10: If you want a looser fit or for a large/XL head. —> 8 moss stitch inc [60 moss stitches])
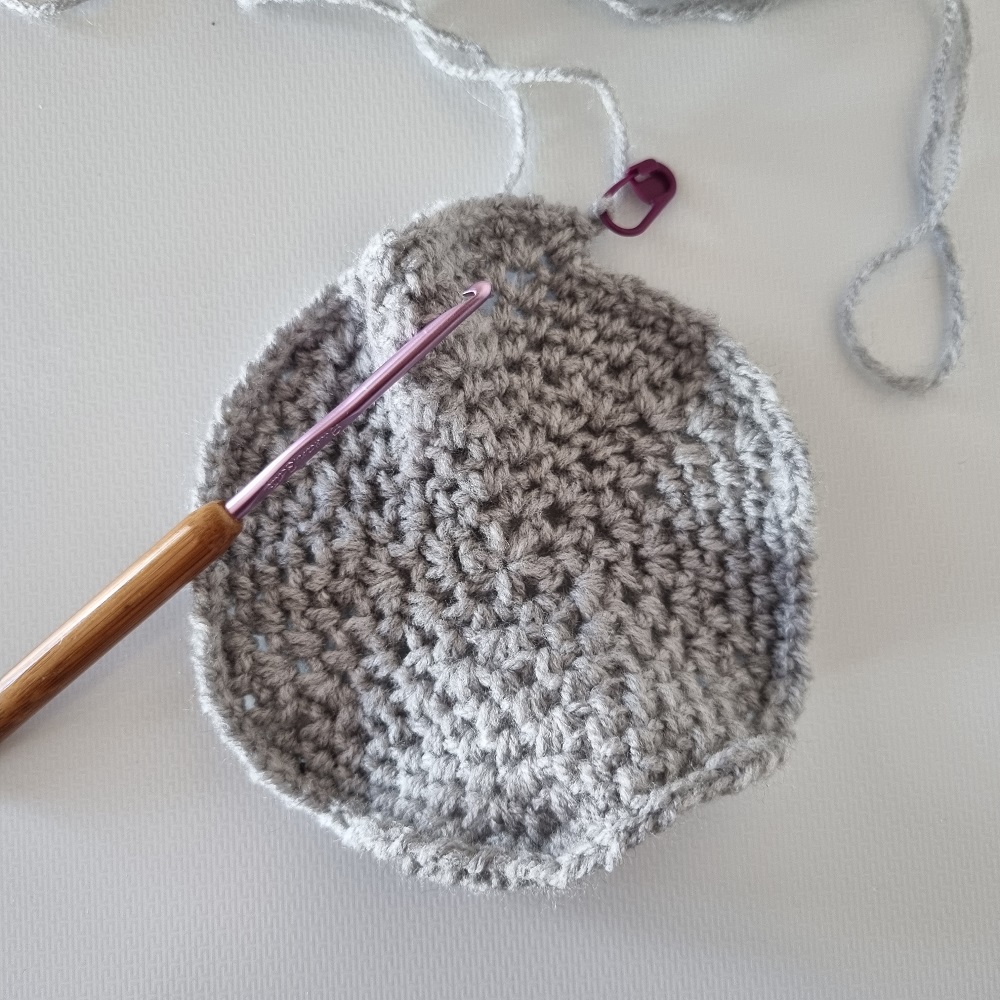
10. Moss stich around.
11 – 16. Repeat row 10.
Now it’s time for the color changing! Change colors in the last chain of the last moss stitch on the previous row. (Read how to change colors in crochet easily here)
17. With Color B moss stitch around.
18. With Color A moss stitch around.
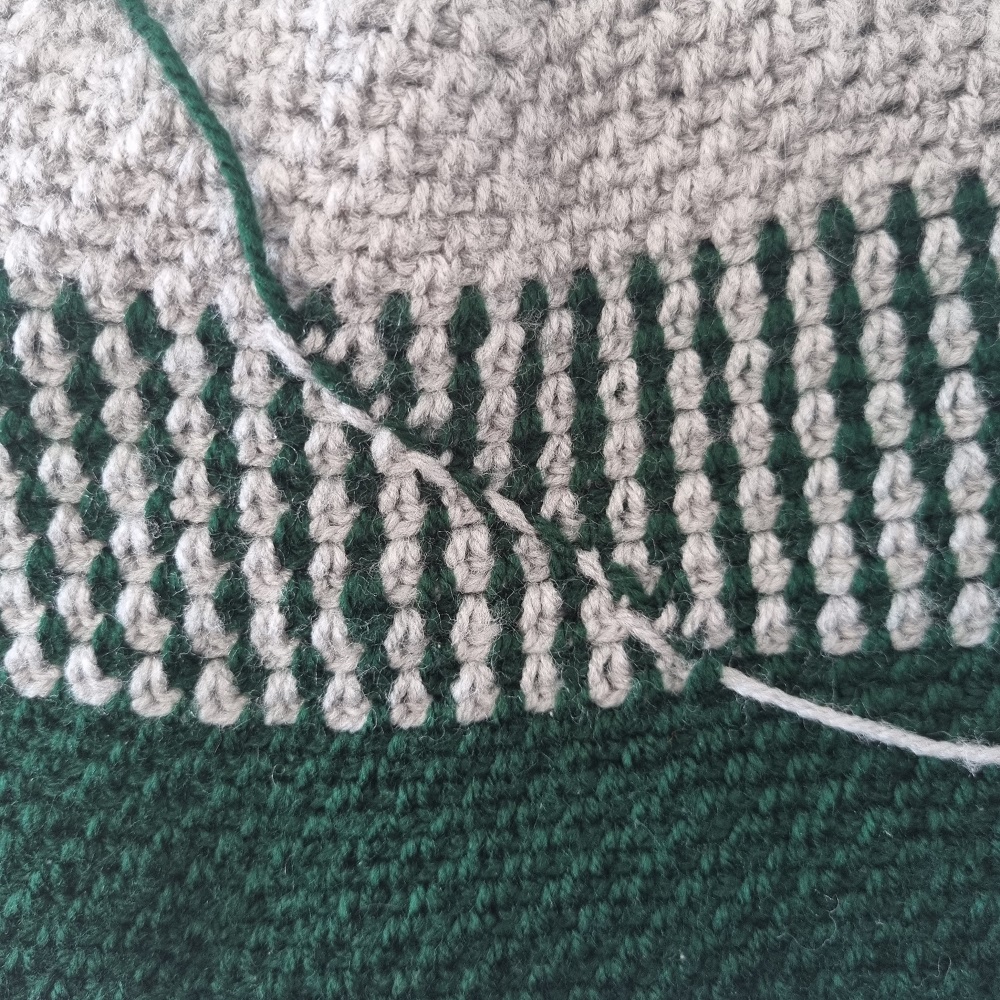
Repeat alternating colors (rows 17 and 18) until you have 12 rows of alternating colors (until row 28)
29. With Color B moss stitch around.
30-40 Repeat row 29. (12 rows of color B)
Fasten off both colors and cut the yarn.
Ribbing (US Terminology):
With Color B
Leave a tail of about 9 inches.
- 1. Chain 12
- 2. Sc starting in second chain from hook, and sc in each stitch to the end (11 sc)
- 3. Chain 1. Sc in BLO across
- 4-100. Repeat row 3 until 100 rows or ribbing reaches 21 inches slightly stretched out.
Fasten off the yarn, leaving a long tail for stitching onto the beanie.
Ribbing (UK Terminology):
With Color B
Leave a tail of about 23 cm.
- 1. Chain 12
- 2. Dc starting in second chain from hook, and dc in each stitch to the end (11 dc)
- 3. Chain 1. Dc in BLO across
- 4-100. Repeat row 3 until 100 rows or ribbing reaches 53 cm slightly stretched out.
Fasten off the yarn, leaving a long tail for stitching onto the beanie.
Finishing the Moss Stitch Crochet Beanie
Sew up the edge of the ribbing, making sure that it’s not twisted to make a loop of the ribbing.
Using stitch markers, evenly place the ribbing around the edge of the beanie.
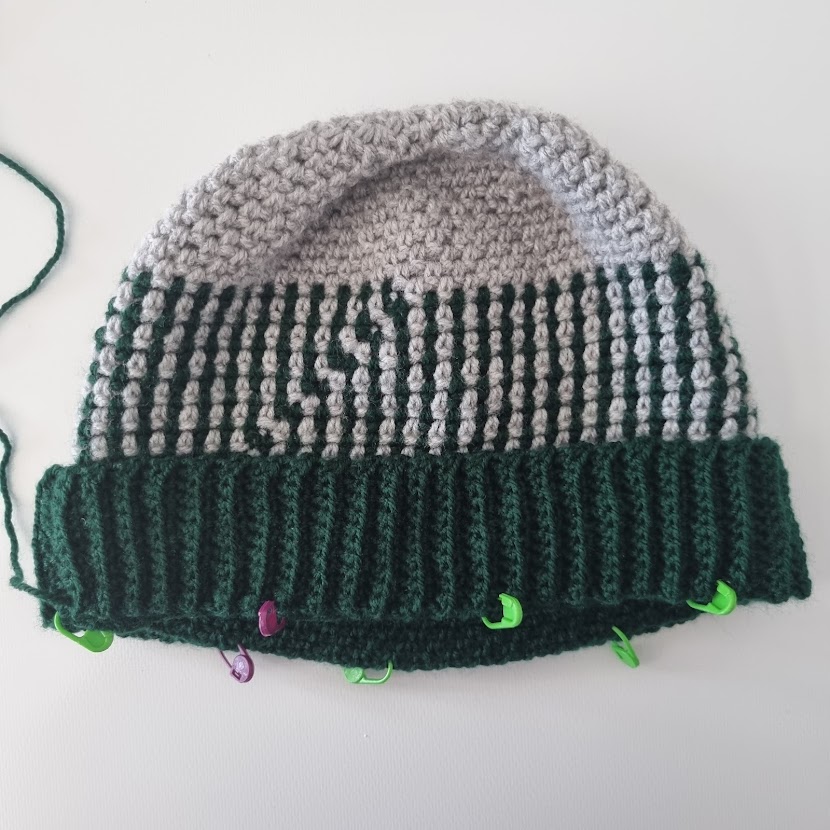
Sew the ribbing onto the beanie.
Weave in all of the ends, and you’ve got a finished color changing moss stitch crochet beanie! If you need to, block the hat.
Add this pattern to your notebook on Ravelry!
