
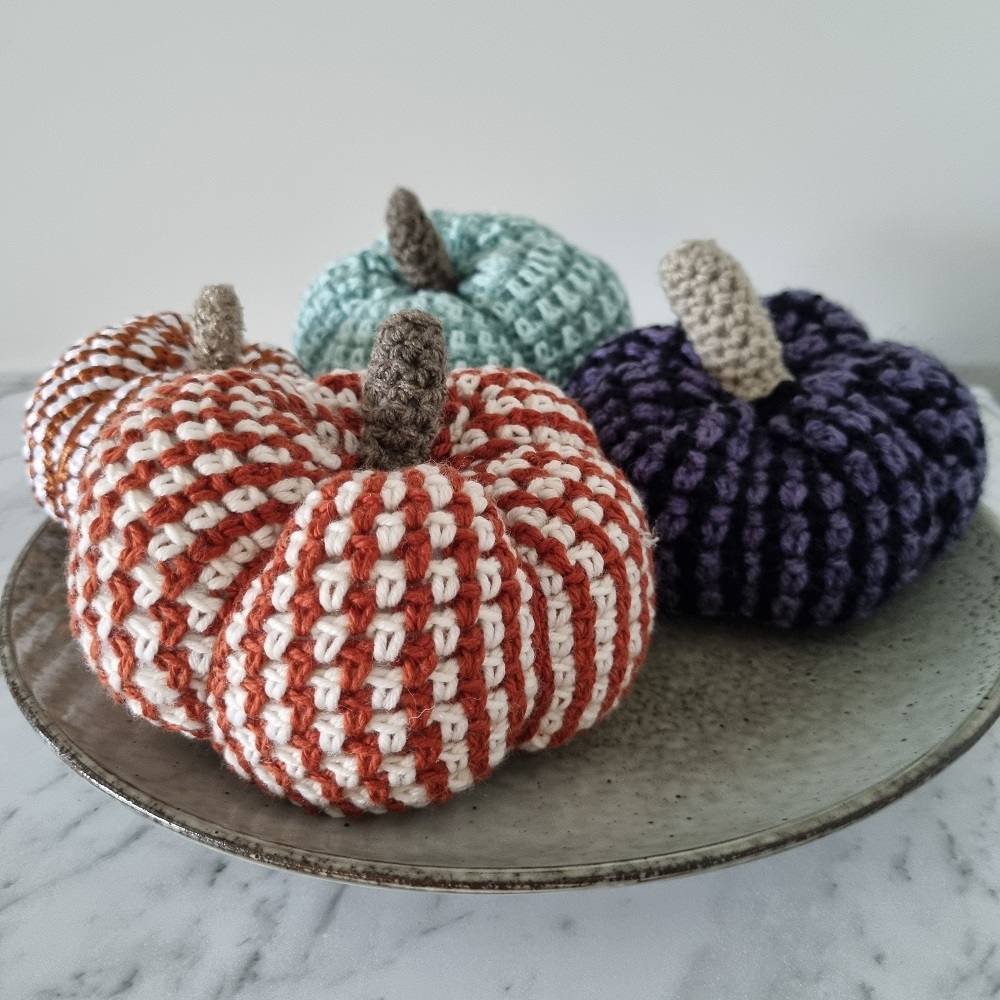
It’s pumpkin season!!!! Well, in my world pumpkin season is almost all year round. But with Halloween and Thanksgiving coming around the corner, it’s time to crochet some pumpkins.
Having just finished up the Color Changing Moss Stitch Beanie, I thought it would be really fun to make some small pumpkins with the same color changes, making vertical stripes while crocheting horizontally!
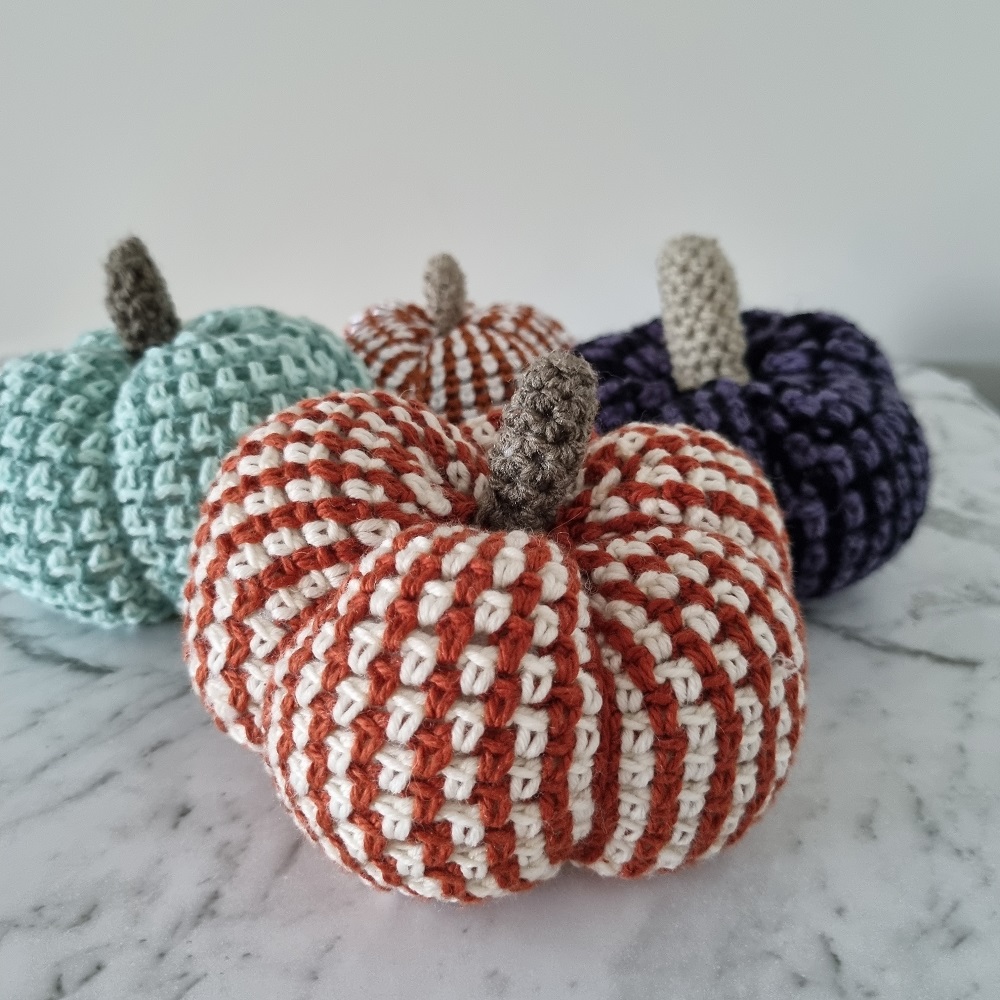
Stash Buster Crochet Pumpkin Pattern Overview
These pumpkins are great because you can easily modify for how big of a pumpkin you want. The key things to remember are to chain an uneven number to start, and two colors of yarn!
*This post may include affiliate links. When you purchase items from these links, we will receive a small commission, at no extra cost to you, to help support this website. Thank you for your support! Read more ->
This will have specific instructions for one size of pumpkin, but change it to bigger or smaller for whatever you’d prefer!
The biggest things to keep in mind: Make sure both yarns you use are the same weight (ply), and use 1mm smaller of a hook than the yarn suggests. With any type of amigurumi or anything that gets stuffed, you want a tighter stitch and the moss stitch is one of the stretchier stitches, at least vertically. (So if using a DK/8ply that recommends using a 4mm hook, I’m using a 3mm hook).
Save this pattern to your favorites on Ravelry!
Teal Pumpkin Project
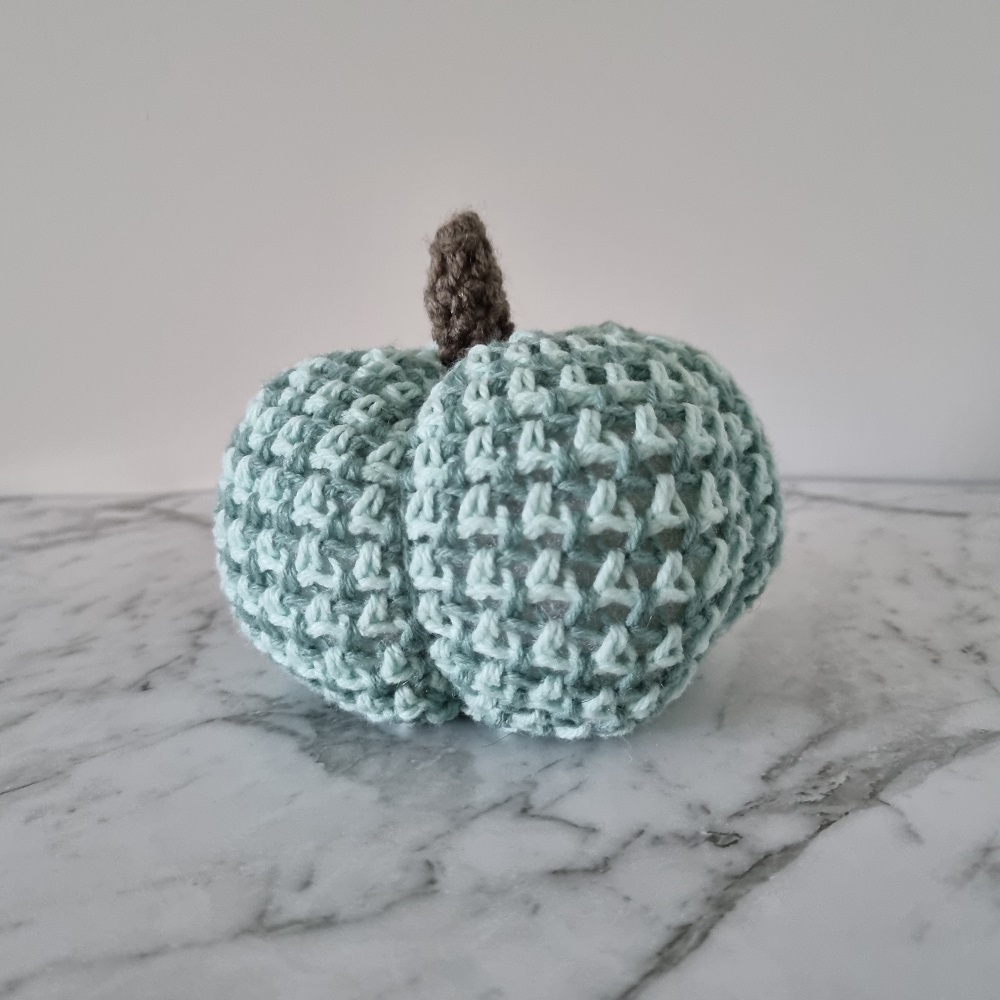
Have you heard of the teal pumpkin project? There are a lot of kids who can’t eat candy, whether it’s a food allergy or some other reason. Which can be really hard on Halloween with trick-or-treating.
The teal pumpkin project is a way to signal to people trick-or-treating that you have non-food items for them to get instead of candy. Have a teal pumpkin outside on Halloween and then people know to come to you!
A perfect way to make a teal pumpkin is to crochet your own! Just use teal yarn colors.
What You’ll Need:
3 colors of yarn of 8ply (double knit). 2 colors are for the body of the pumpkin, the third is for the stem.
In the images, I’m calling the orange: color A, white: color B, and brown: color C
My yarn totals I used are 20g of color A, 15g of color B, and <2g of color C
3.00 mm crochet hook
Darning needle (a long doll’s needle might be helpful too but is not necessary)
Stitch Marker – Read why stitch markers are helpful!
Scissors
Stuffing
Finished size: (before sewing closed): 4 3/4 inches [12cm] tall by 6 inches [15cm] wide
Gauge (for the moss stitch): 11 stitches and 12 rows in 2 inches (5cm) [but gauge really doesn’t matter for this pattern]
Crochet Pumpkin Pattern
Terms (US Terminology)
Ch = chain
Sc = single crochet
Sc BLO = single crochet in back loop only
Moss stitch crochet = sc1, ch1, the sc is always worked into the chain1 space from the previous row.
Terms (UK Terminology)
Ch = chain
Dc = double crochet
DC BLO = double crochet in back loop only
Moss stitch crochet = dc1, ch1, the dc is always worked into the chain1 space from the previous row.
Instructions
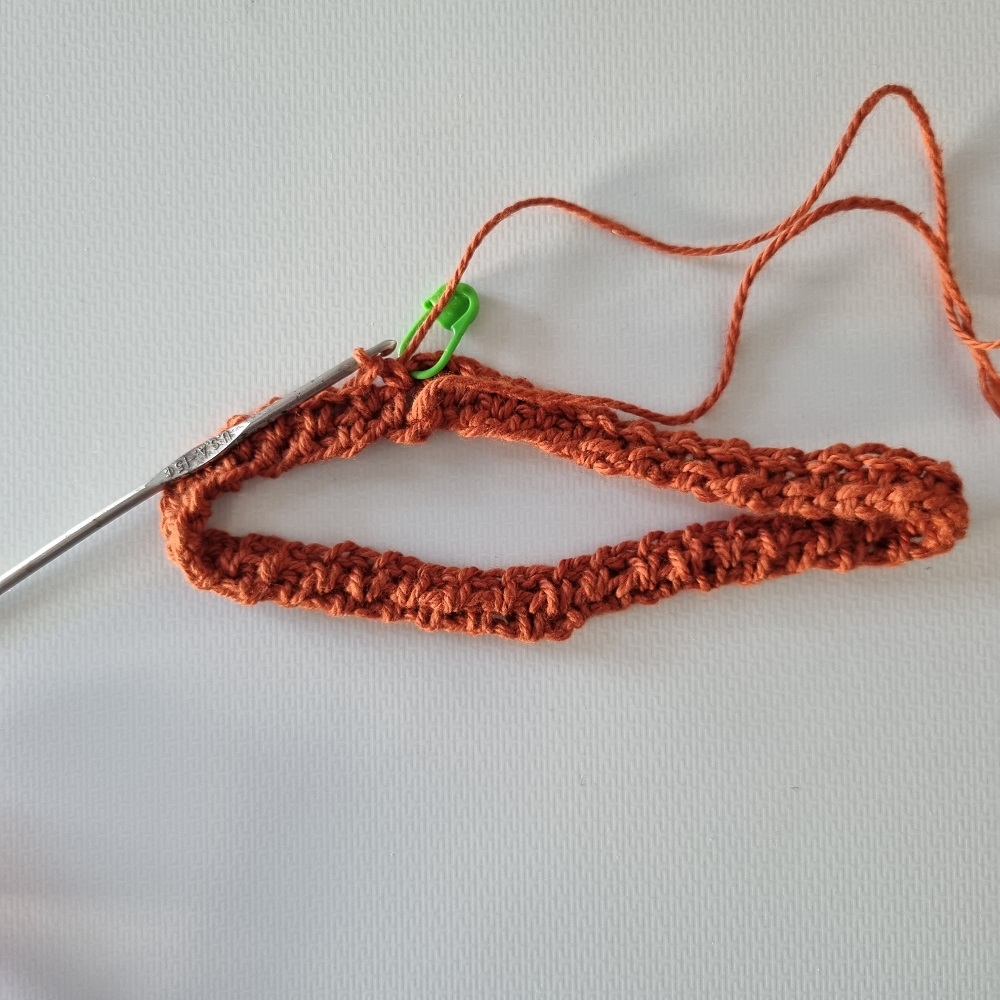
Founding chain: With color A: Leave a long tail (about 24 inches/ 60 cm) Start by chaining 71. Carefully making sure it’s not twisted, slip stitch to the first chain, making a loop. Chain 1 and add a stitch marker. This is the start of the row.
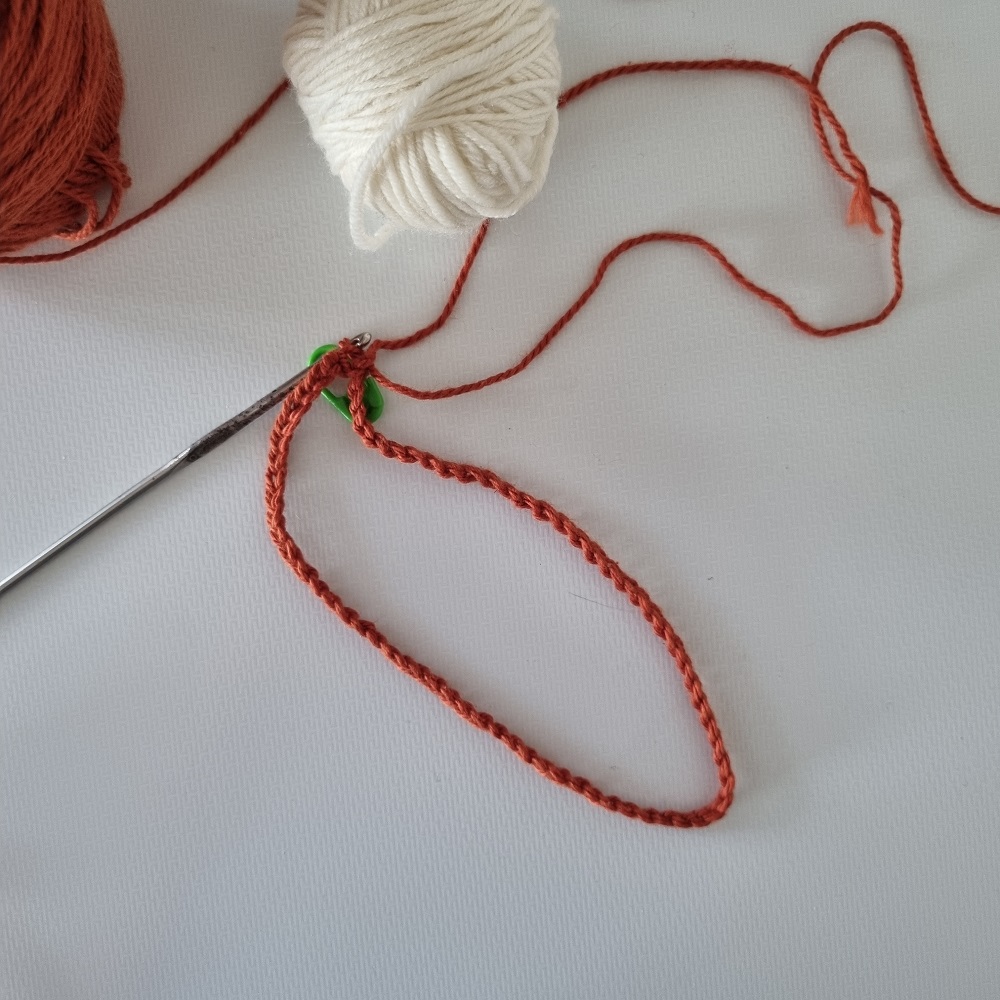
Row 1 (US Terms): In the first chain of the founding chain, sc 1. Chain 1, and skip the next chain on the founding chain. Sc1 into the next. So around: (sc1 into the founding chain, ch1, skipping the next chain on the founding chain). Continue until you’re at the start of this round. (36 moss stitches)
Row 1 (UK Terms): In the first chain of the founding chain, dc 1. Chain 1, and skip the next chain on the founding chain. Dc1 into the next. So around: (dc1 into the founding chain, ch1, skipping the next chain on the founding chain). Continue until you’re at the start of this round. (36 moss stitches)
Row 2: Connect to the chain 1 that was after connecting the chain. Keep working in the round and just go onto that last chain that the stitch marker is in. Moss stitch around. On the last chain of the moss stitch of the round, change to color B
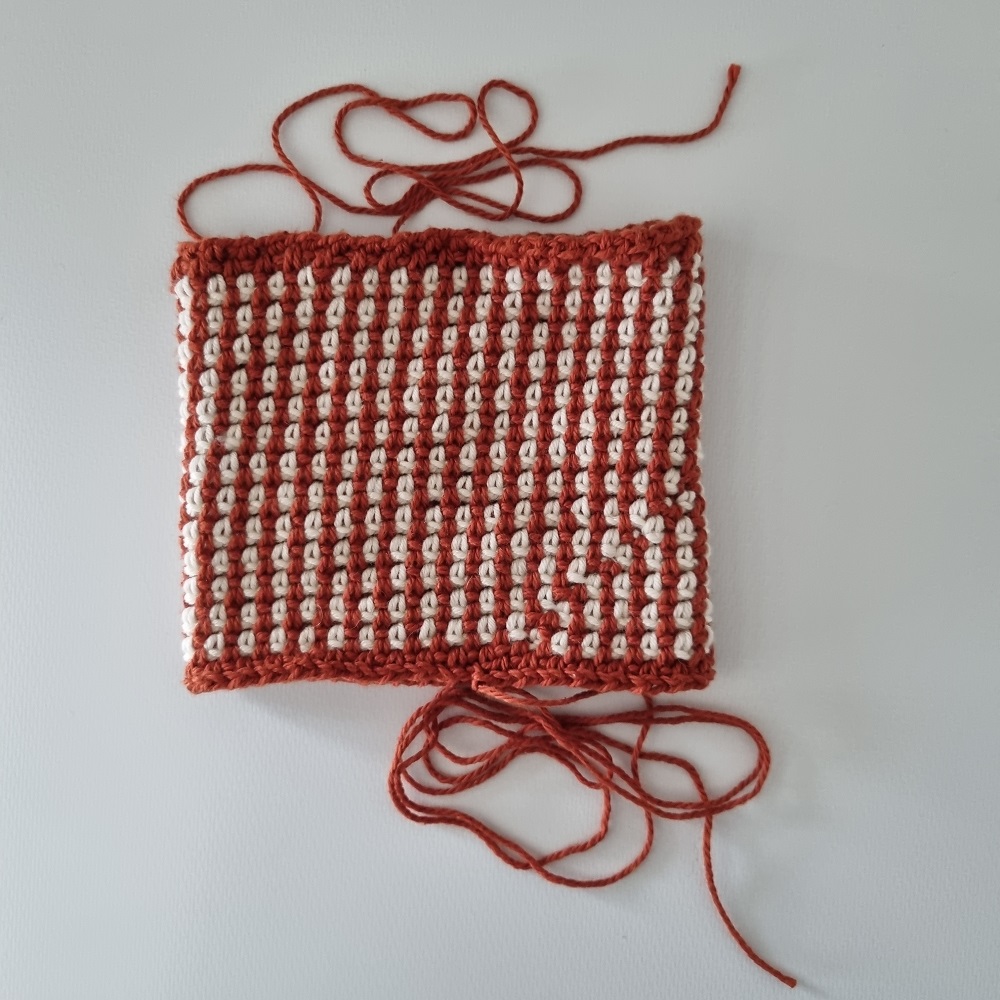
Row 3: Moss stitch around, changing the color on the last chain of the moss stitch of the round.
Repeat row 3, alternating colors A and B every row until it’s reached 4 1/4 inches (11 cm) in height. Have the last 2 rounds in color A.
Tie off, leaving a long tail at least 48 inches or 120cm length. You’ll need more than you’ll think! (If you’ve forgotten to leave a long tail on either end, just tie one one!)
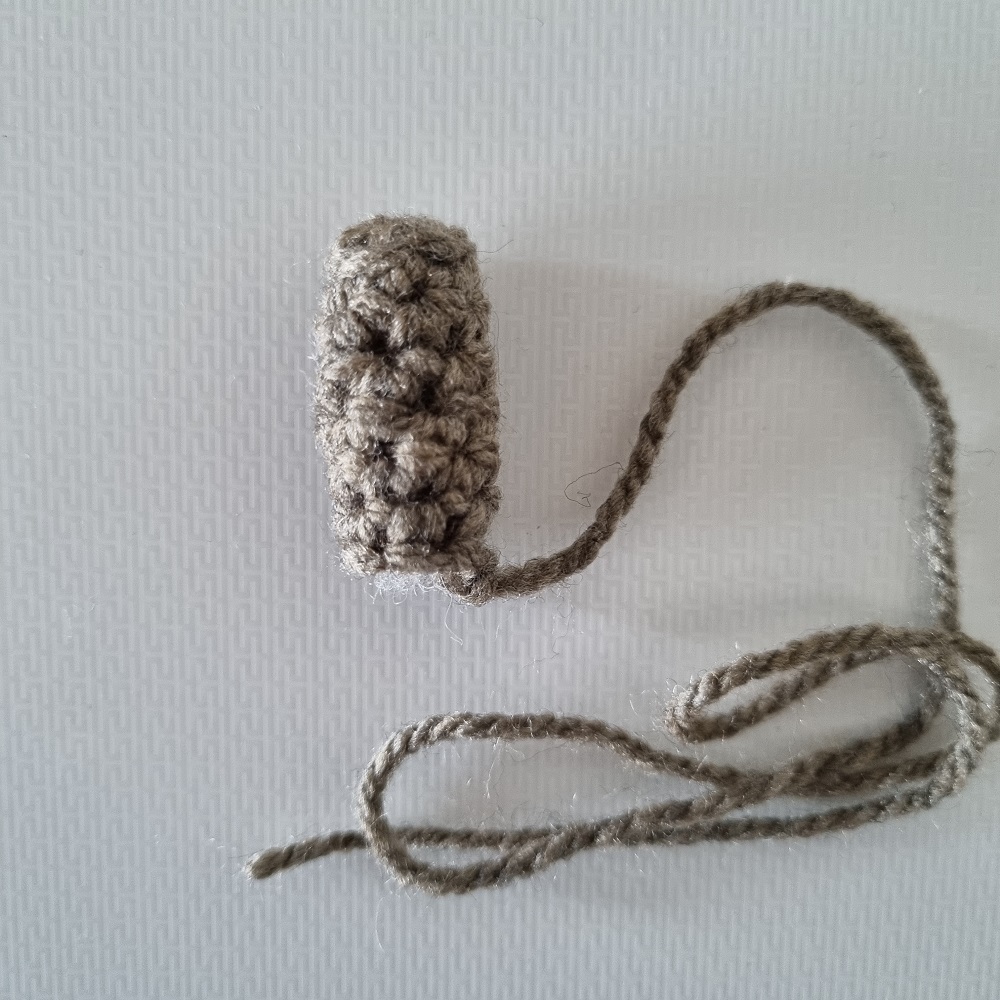
Pumpkin Stem US Terminology
With color C, do 6sc in a magic loop.
Row 1: sc in BLO around (6sc)
Rows 2-7: sc around (6sc)
Fasten off and leave a long tail to sew onto the pumpkin.
Pumpkin Stem UK Terminology
With color C, do 6dc in a magic loop.
Row 1: dc in BLO around (6dc)
Rows 2-7: dc around (6dc)
Fasten off and leave a long tail to sew onto the pumpkin
Finishing the Crochet Pumpkin
To finish the crochet pumpkin pattern, it’s time to put it together! Tie off any of the loose strands inside of the pumpkin.
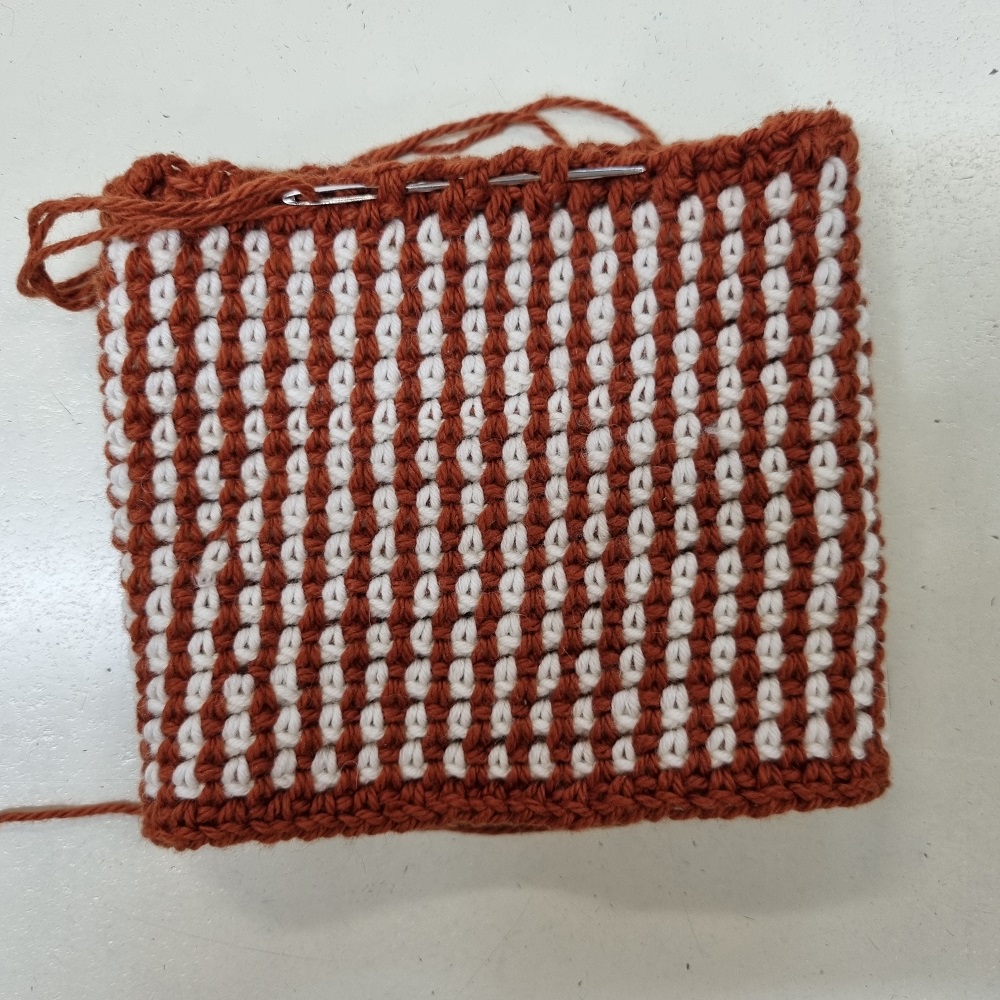
On one side of the pumpkin, take the tail and start weaving it between each moss stitch at the top. Once through all of the stitches, pull the yarn tight. This creates one base of the pumpkin! Tie off as tightly as you can, to ensure it’s closed.
If there’s a bit of a gap still, just weave your yarn between the sides, pulling it tight.
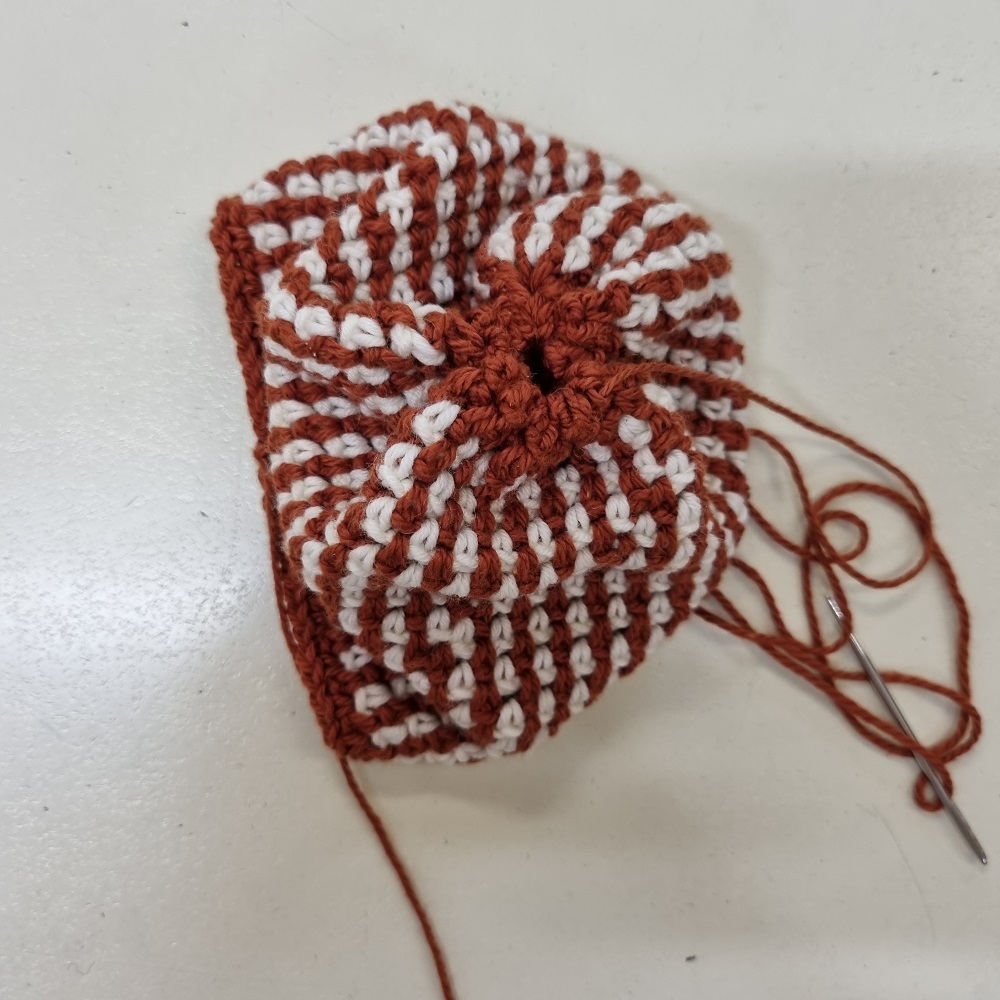

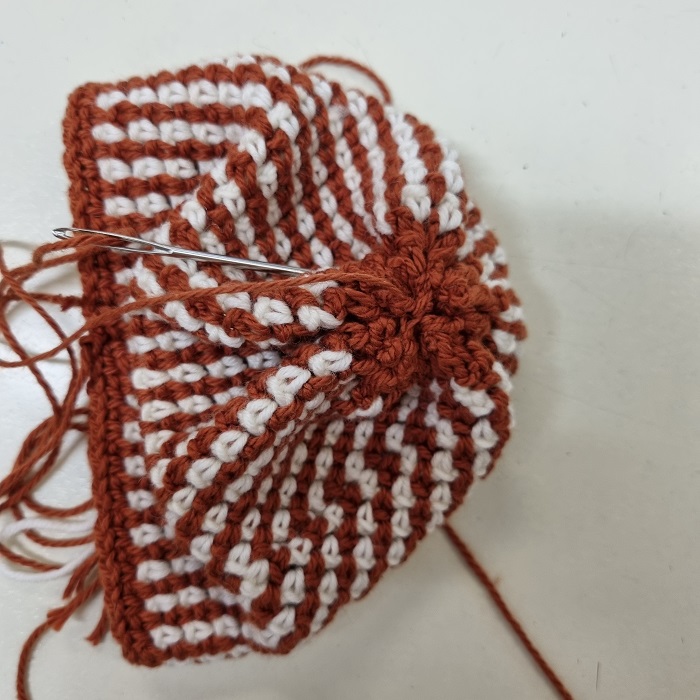
With the remaining open side, take the tail and weave it between each stitch. Once it’s through all stitches, STUFF the pumpkin. (It’s just easier to weave in the tail first). Stuff it until it’s as squishy/hard as you prefer.
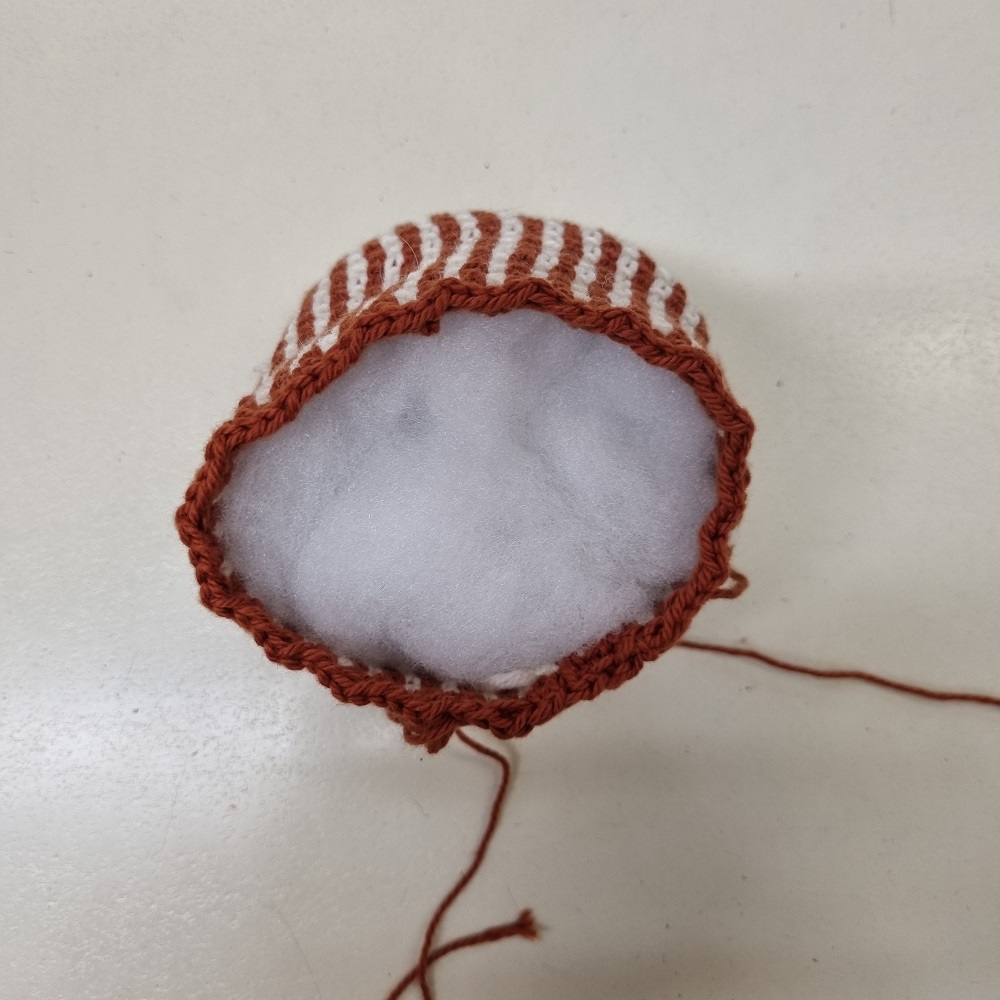
Next, stuff the stem. If you’re having difficulty getting the stuffing into the stem, push it in with the back of a crochet hook.
Take the end that’s been woven through the top and pull it tight now. Tie it tightly.
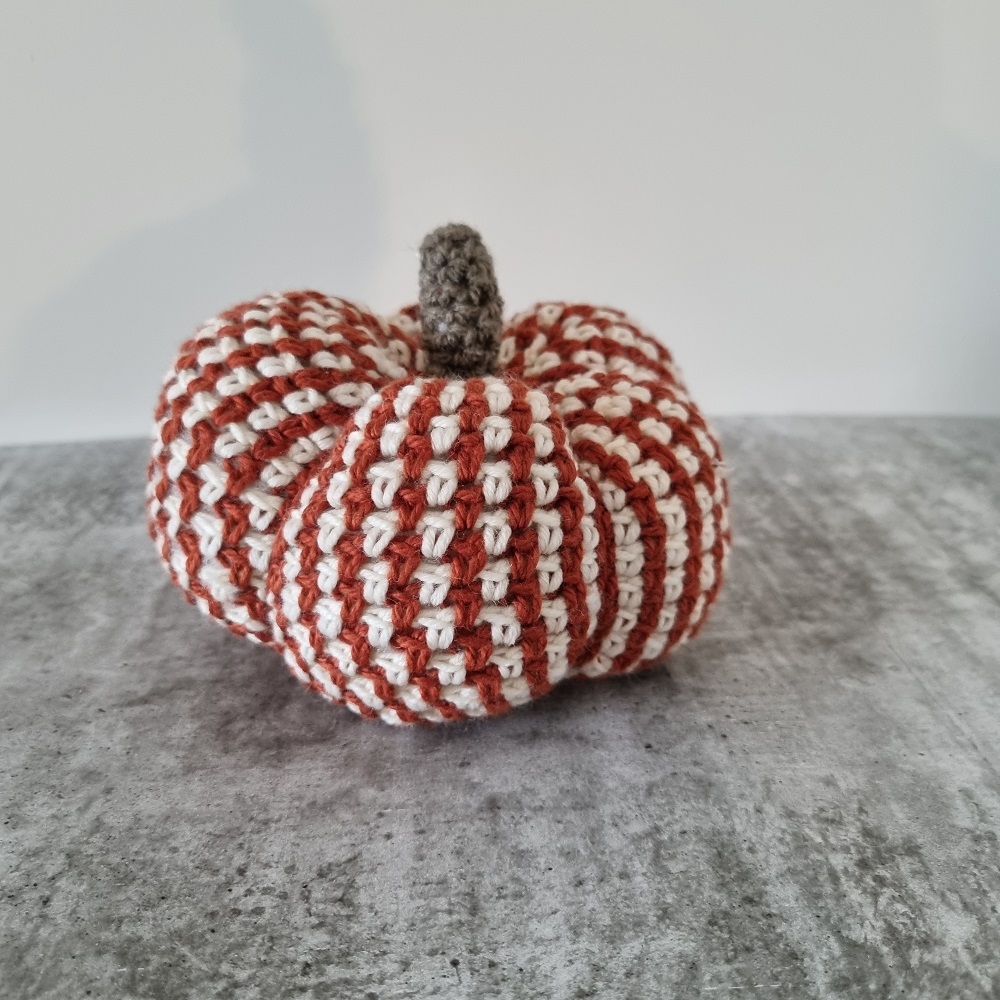
Give it the Pumpkin Shape

Next up with the crochet pumpkin pattern, with whichever tail is longer, wrap it around the edge of the pumpkin from one end to the other. Take the yarn directly through the middle of the pumpkin, and pull it tight.
Repeat this action 4 more times, going close to evenly around the pumpkin to make 5 wedges. Pull tight and tie off. Weave in any remaining ends.
Sew the pumpkin stem to whichever side you’ve chosen to be the top.
Optional – Make Faces!
If you want the pumpkin to have a face, just cut it out of felt or something similar and sew it on!
Save this to your notebook on Ravelry!
