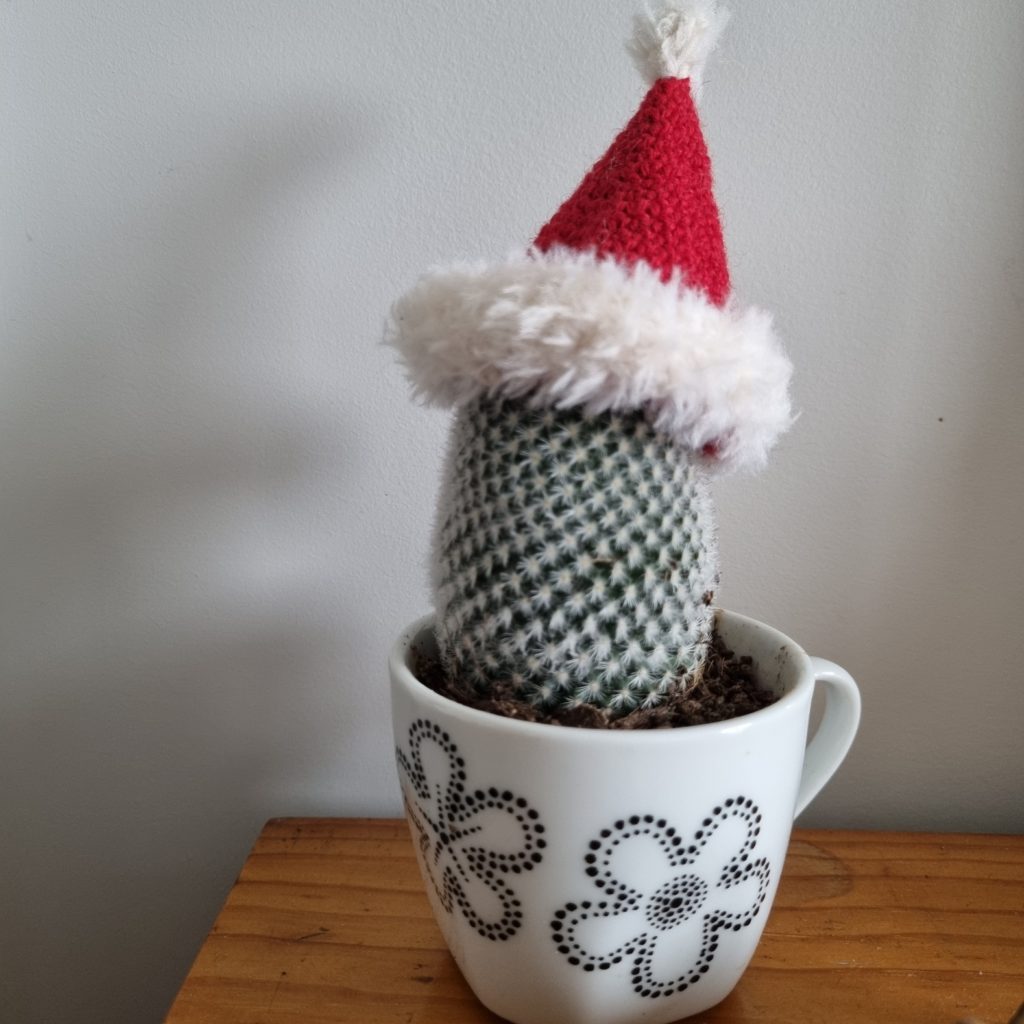
I love Christmas, as well as love all of my amigurumi. So what better thing to do than make a crochet santa hat for each of my animals?
These mini santa hats work great for small stuffed animals, or would even be perfect as ornaments for the tree! They’re small and easy to make, so you can make as many as you want.
There are so many ways to use these mini crochet Santa hats: Let your amigurumi wear them, make them into ornaments, create a garland of them all, add them to gift wrapping, put it on a headband and wear it yourself, make a pair and turn them into earrings, convince a cat to wear it, or anything else you can think of!
*This post may include affiliate links. When you purchase items from these links, we will receive a small commission, at no extra cost to you, to help support this website. Thank you for your support! Read more ->
The possibilities are endless.
As always, this pattern starts with the US terms. For the UK terms, just keep scrolling down!

Save this pattern to your Ravelry library!
What You’ll Need:
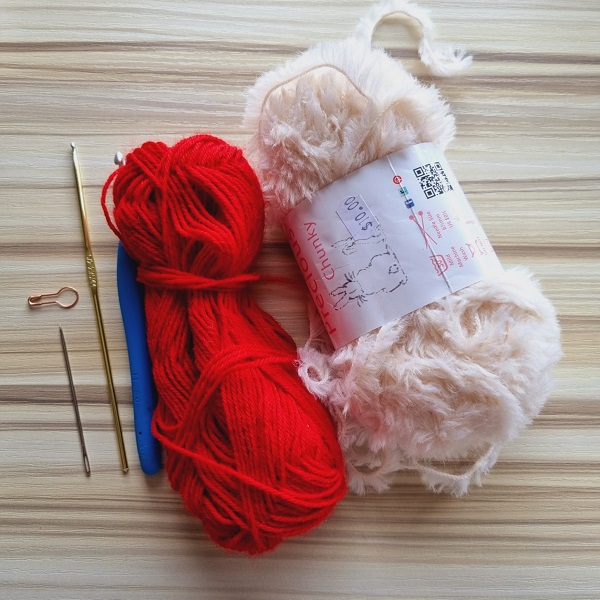
4ply yarn for the main part of the hat (I suggest red), and a faux fur yarn in white or cream (A good option is Lion Brand Go for Faux)
What I used: 6g (about 24m) Sirdar Country Classic True Red , and 3g (about 5m) Peter Pan Precious Chunky
*be sure to have some extra in case your meterage is different, but I’ve made 8 out of this red ball of yarn and have enough for a few more!
2.75mm hook and a 5mm hook
Darning needle
Stitch marker – read why stitch markers are helpful!
Scissors
Optional: Ribbon if you’re making this into an ornament/stringing them together
Gauge does not really matter, but with the red yarn, mine is 6 stitches and 6 rows in 2.5cm (1 inch)
Size
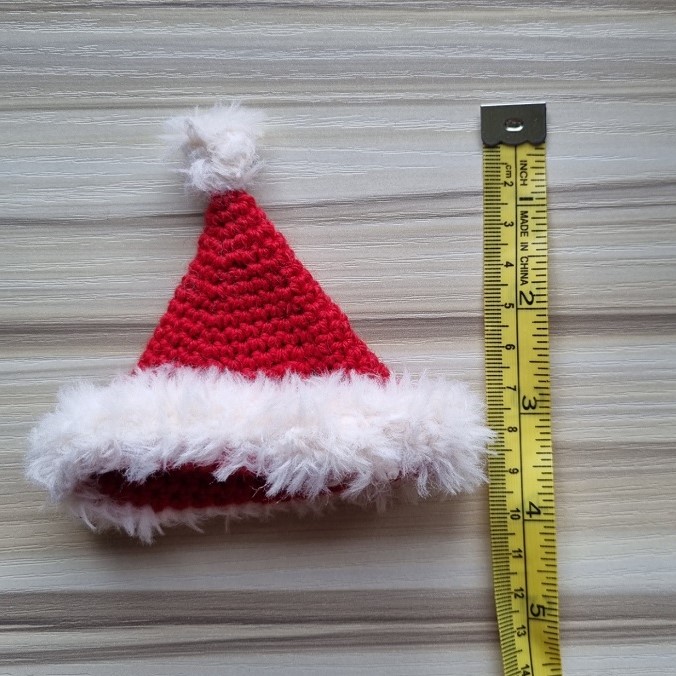
As this is a mini santa hat, it is a small hat! The size is about 3 1/2 inches in diameter (9cm) at the base, and 4 inches tall (10cm) including the pompom.
If you want to make this smaller, just stop earlier in the increases, and finish the hat with 4 rows of sc in the red, and 3 sc in the faux fur. If you want to make this slightly bigger, keep repeating the pattern until it’s the width you want! Then finish with 4 rows of sc in red, and 3 sc in the faux fur.
You can also make this bigger by using a larger hook or thread! (I’ve also made a human adult sized version that you can read about here).

Mini Santa Hat Pattern US Terms
This is a really simple hat to make, where the only thing that has to get attached at the end is the pompom!
Terminology
Sc = single crochet
Ch = chain
Sl = slip stitch
Inc = increase (2 sc in same space)
Pattern
There are two different ways to start this hat, depending on how comfortable you are with a magic ring.

Starting with the red and 2.75mm hook:
Either: make a magic ring and do 4 single crochet into the magic ring. Mark the end of the row with your stitch marker.
Or: ch 2, in the second chain from the hook, 4sc. Put a stitch marker in to mark the end of the row.
Move the stitch marker at the end of each row.
Row 1: sc around (4)
Row 2: inc around (8)
Row 3: sc around (8)
Row 4: (sc, inc) around (12)
Row 5: sc around (12)
Row 6: (2sc, inc) around (16)
Row 7: sc around (16)
Row 8: (3sc, inc) around (20)
Row 9: sc around (20)
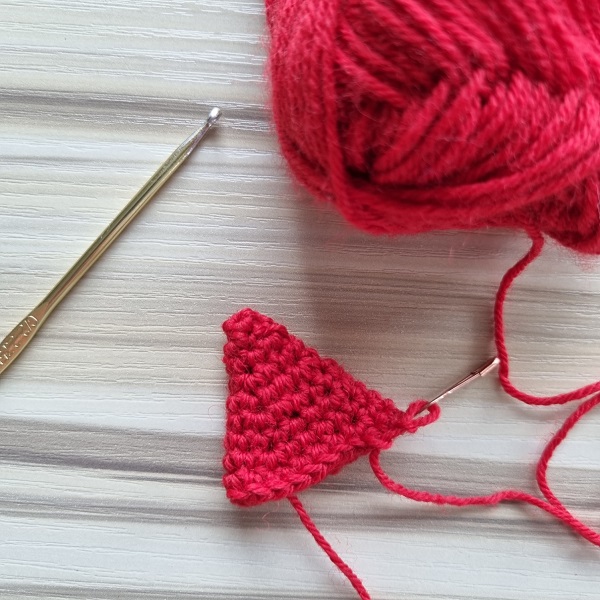
Row 10: (4sc, inc) around (24)
Row 11: sc around (24)
Row 12: (5sc, inc) around (28)
Row 13: sc around (28)
Row 14: (6sc, inc) around (32)
Row 15: sc around (32)
Row 16: (7sc, inc) around (36)
Row 17: sc around (36)
Row 18: (8sc, inc) around (40)
Rows 19-22: sc around (40)
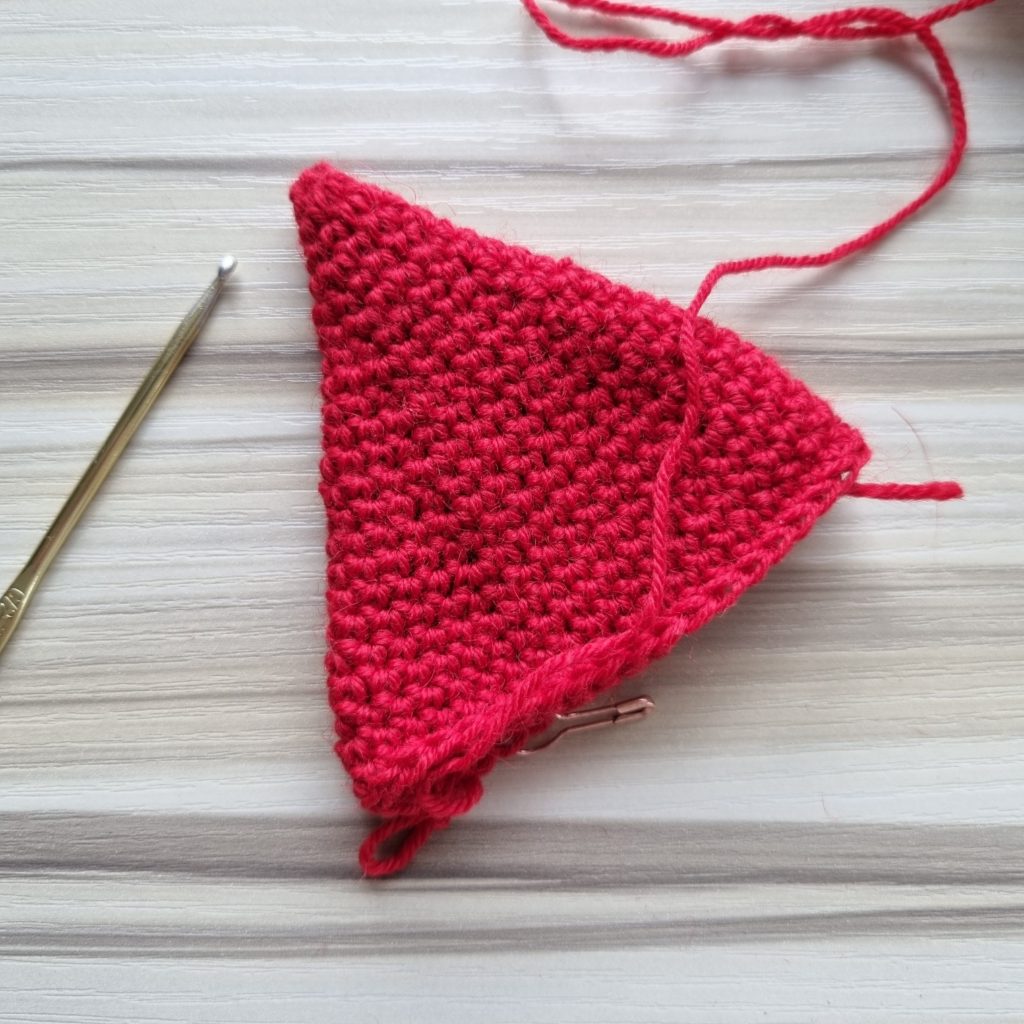
Switch to faux fur yarn:
Rows 23-25: sc around (40)
Fasten off, and weave in ends. If you’re having a hard time weaving in the ends of the fur yarn, cut off some of the fuzzy bit at the end, keeping just the cord part. Or use a needle threader.
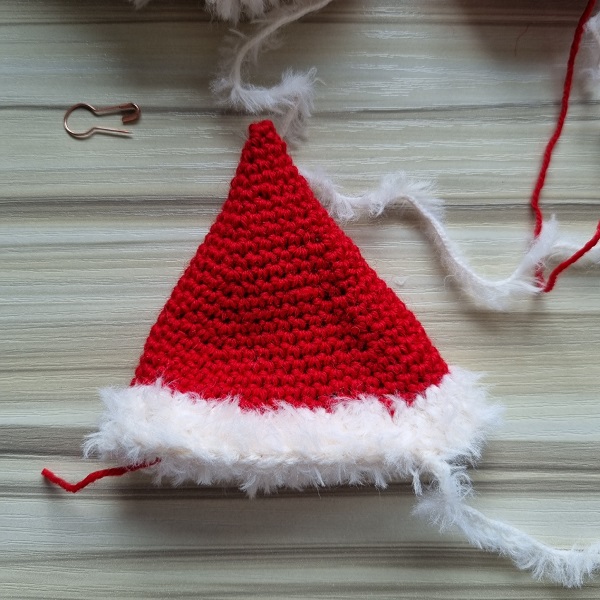
Make the Pompom
With the Faux Fur and 5mm hook:
Chain 2. In the second chain from hook, 5sc. Fasten off leaving a medium sized tail.

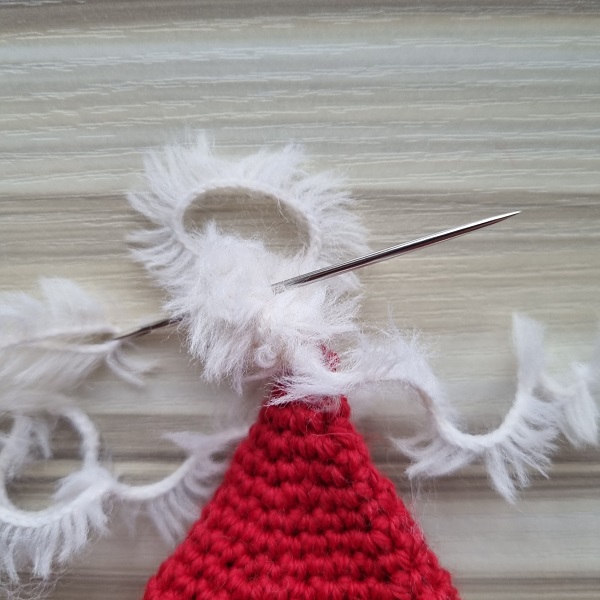
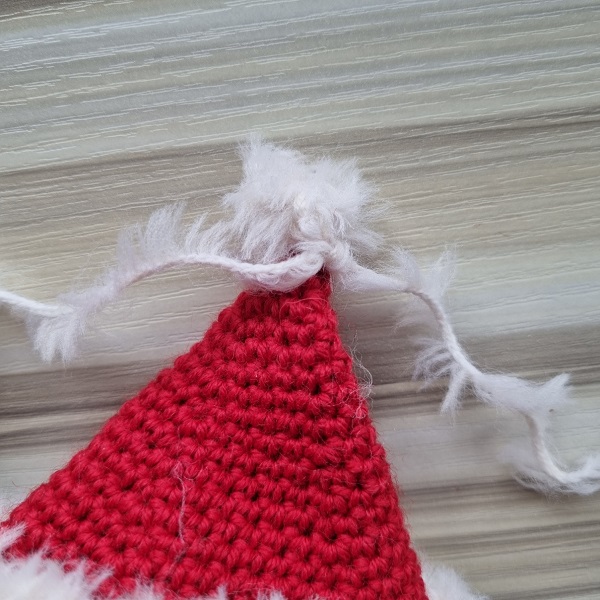
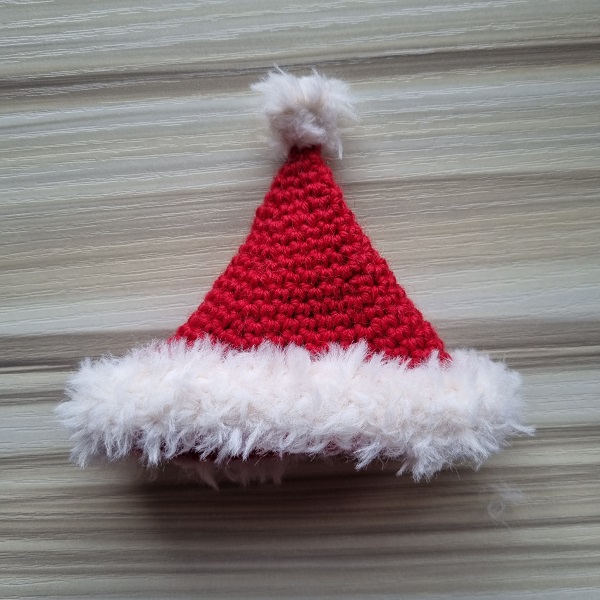
Figure out which side of the crochet santa hat you want to be the outside, and tie the pompom on top. Here’s how I was tying it on:
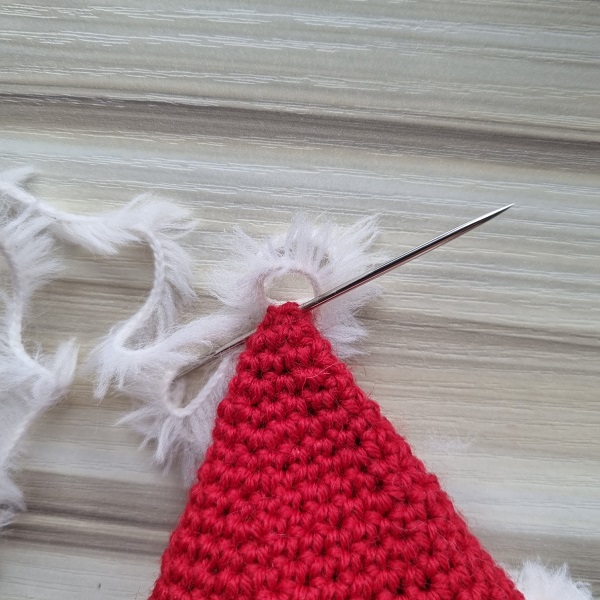
Thread the longer tail through the needle. At the very top of the hat, put the needle through.

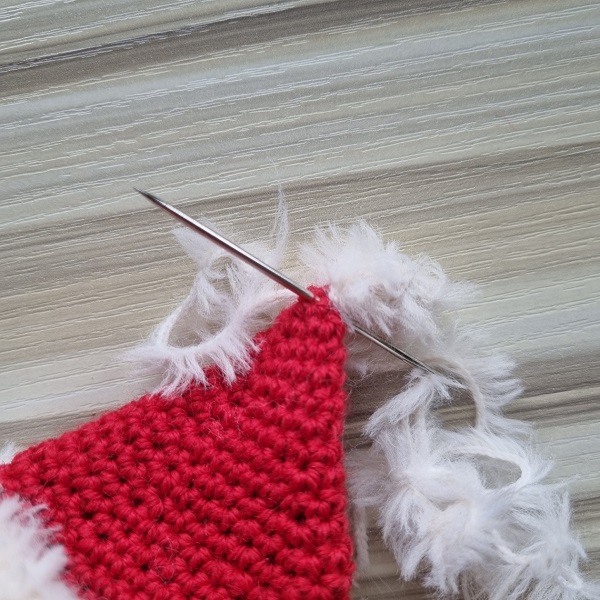
Take the longer end and pull it through the top of the hat again.
Finishing
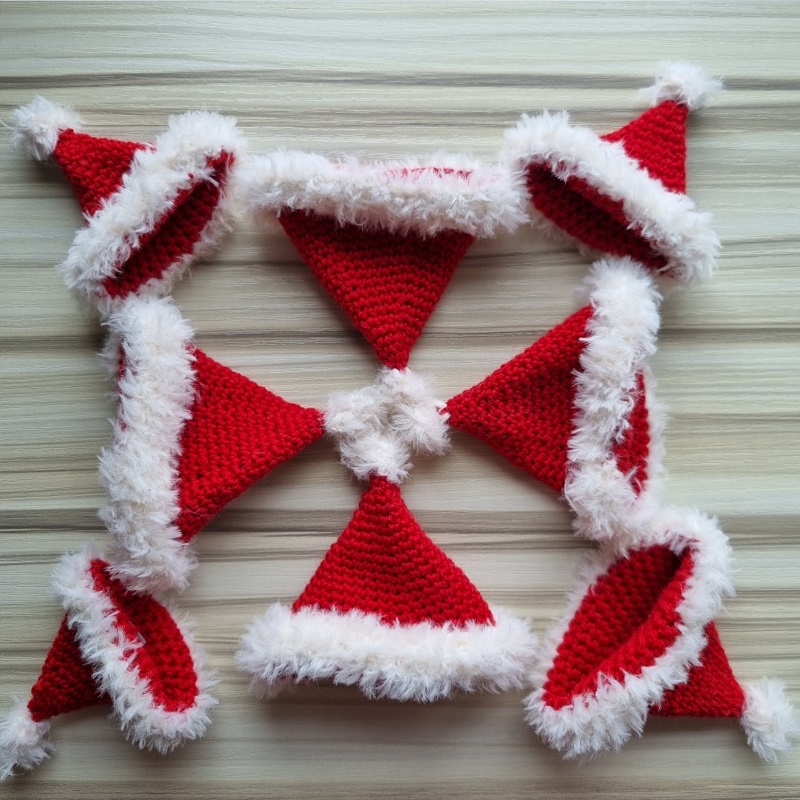
To finish, fold up the white brim, add a ribbon if you’re going to hang it, and decide what this mini crochet santa hat goes on! And enjoy!

Save this pattern to your Ravelry library!
Mini Santa Hat Pattern UK Terms
This is a really simple hat to make, where the only thing that has to get attached at the end is the pompom! These are the instructions in UK terminology.
Terminology
Dc = double crochet
Ch = chain
Sl = slip stitch
Inc = increase (2 dc in same space)
Pattern
There are two different ways to start this hat, depending on how comfortable you are with a magic ring.
Starting with the red and 2.75mm hook:
Either: make a magic ring and do 4 double crochet into the magic ring. Mark the end of the row with your stitch marker.
Or: ch 2, in the second chain from the hook, 4dc. Put a stitch marker in the last row.
Move the stitch marker at the end of each row.
Row 1: dc around (4)
Row 2: inc around (8)
Row 3: dc around (8)
Row 4: (dc, inc) around (12)
Row 5: dc around (12)
Row 6: (2dc, inc) around (16)
Row 7: dc around (16)
Row 8: (3dc, inc) around (20)
Row 9: dc around (20)
Row 10: (4dc, inc) around (24)
Row 11: dc around (24)
Row 12: (5dc, inc) around (28)
Row 13: dc around (28)
Row 14: (6dc, inc) around (32)
Row 15: dc around (32)
Row 16: (7dc, inc) around (36)
Row 17: dc around (36)
Row 18: (8dc, inc) around (40)
Rows 19-22: dc around (40)
Switch to faux fur yarn:
Rows 23-25: dc around (40)
Fasten off, and weave in ends. If you’re having a hard time weaving in the ends of the fur yarn, cut off some of the fuzzy bit at the end, keeping just the cord part. Or use a needle threader.
Make the Pompom
With the Faux Fur and 5mm hook:
Chain 2. In the second chain from hook, 5dc. Fasten off.
Figure out which side of the crochet santa hat you want to be the outside, and tie the pompom on top. Look at the US terminology for how to tie on the pompom!
Finishing
To finish, fold up the white brim, add a ribbon if you’re going to hang it, and decide what this mini crochet santa hat goes on! Enjoy! And happy holidays!


