
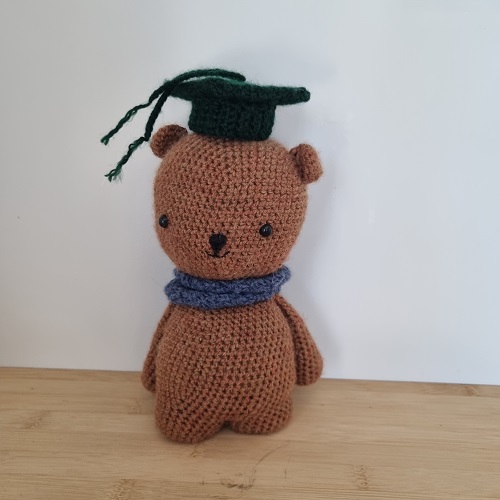
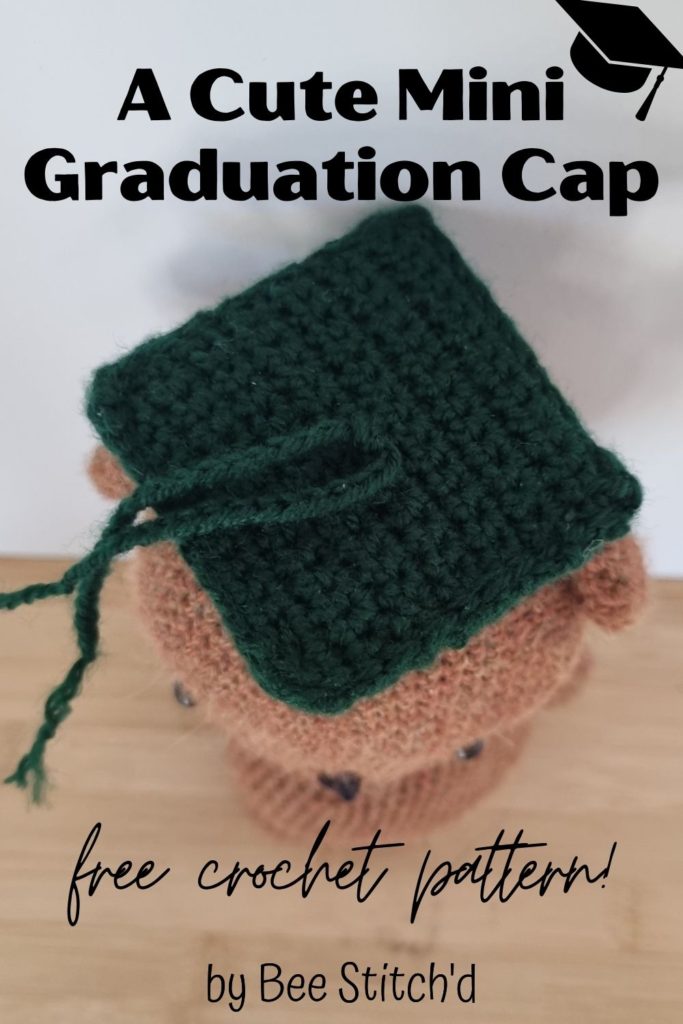
If you’ve got a graduate in your life, there’s a chance you (or they) may want to commemorate it! And what better way than to make a crochet graduation cap?
This graduation cap is extremely easy to change the size of, so you can make it miniature to fit a teddy bear, or human sized to actually fit a person’s head! Or make it to put on top of your graduation cap!
For this pattern, find a mini sized graduation cap, a small size, and options to make it bigger!
*This post may include affiliate links. When you purchase items from these links, we will receive a small commission, at no extra cost to you, to help support this website. Thank you for your support! Read more ->
This pattern is almost literally one of the easiest you can do, because all you have to know is how to single crochet, slip stitch and sew pieces together!
As always, read for the US terminology, and scroll down for UK terminology!
Add this pattern to your Ravelry Notebook!
What You’ll Need:
8ply yarn (suggestion – use a school color!) I used 7g (about 30m) of acrylic yarn for the mini crochet graduation cap
3mm hook (or a hook that’s smaller than the suggested one for the yarn you’re choosing)
Darning needle
Stitch marker – read why stitch markers are helpful!
Scissors
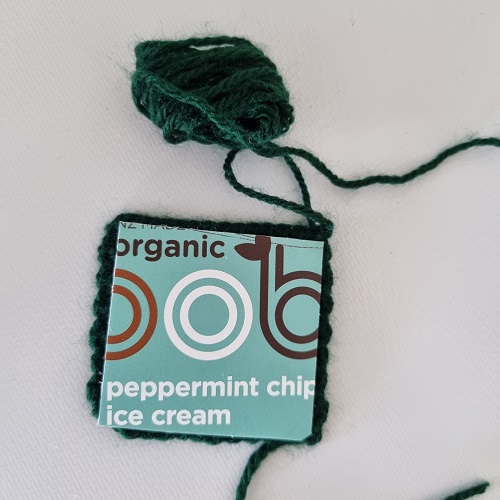
Plastic/cardboard to keep it stiff
The cardboard/plastic for between the rows can be something you find around the house; I’ll be using the lid of an ice cream tub! If you don’t think this will ever get wet, just use a small piece of cardboard from a cereal or tissue box or something similar.
Gauge does not matter!
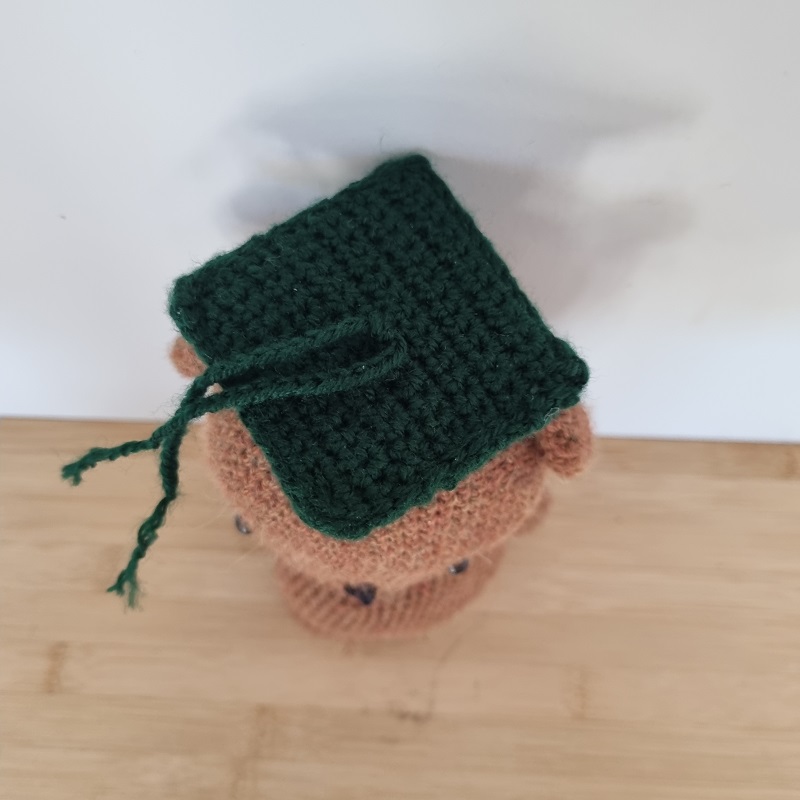
Size: Keep in mind, you can easily make this any size you want! The one in the images is 6.5cm x 6.5cm (2.5 inch x 2.5 inch)
Looking for other miniature headwear? Check out this mini crochet santa hat!
Crochet Graduation Cap Pattern US Terms
The way this pattern works is that you make 2 squares and a rectangle, and need a piece of plastic/cardboard to put between the squares.
Terminology
Sc = single crochet
Ch = chain
Sl = slip stitch
Pattern
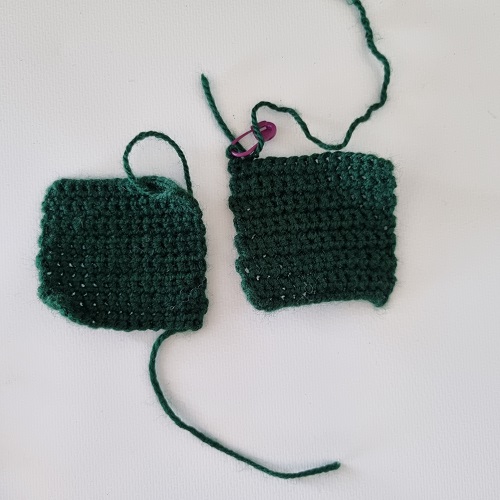
Make 2 Squares:
Start by chaining 15.
Row 1: In the second chain from hook, sc. Sc until the end (14)
Row 2: ch1, sc across (14)
Repeat row 2 until it makes a square (same height as width) – I used 14 rows total)
Tip: Make sure it’s a square by folding the crochet piece in half. If it makes a triangle where both sides are even, you have a square! If the sides aren’t even, you will need to make more/take some rows apart.
One of them, fasten off. The other, don’t fasten off!
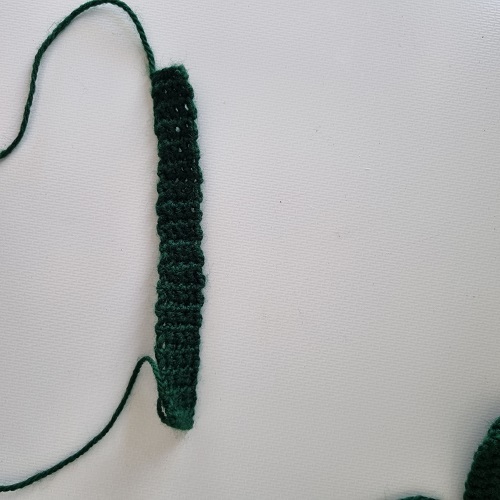
Make a Rectangle:
This rectangle will eventually make a circle on the bottom of the hat that actually goes around the head (on a real graduation cap)
Start by chaining 5.
Row 1: in the second chain from hook, sc. Sc until the end (4)
Row 2: ch1, then sc across (4)
Rows 3-34: repeat row 2
Tie off, and leave a long tail for sewing.
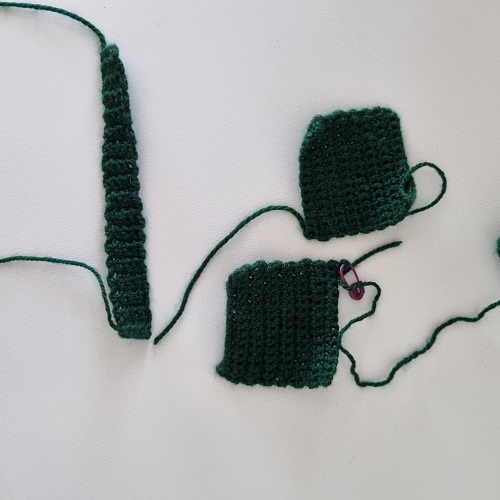
Tassle
ch 46, and tie off, leaving a short tail.
(Scroll down for instructions on how to put this all together)
Modify this pattern to any size:
For the squares, chain until you have the length you want. Then sc across until the rows are as long as the width, making a square.
For the rectangle, repeat the rows until when curling it into a circle, it goes almost to the edges of the squares. Keep in mind, the bigger you make the graduation cap, the wider you’ll want the rectangle. (So you might want to start with more chain)
Actual graduation cap size if you’re wanting to make one to fit a human head are about 9.25 inches or 24cm for the crown (square) part.
Crochet Graduation Cap Pattern UK Terms
The way this pattern works is that you make 2 squares and a rectangle, and need a piece of plastic/cardboard to put between the squares.

Terminology
Dc = double crochet
Ch = chain
Sl = slip stitch
Pattern
Make 2 Squares:
Start by chaining 15.
Row 1: In the second chain from hook, dc. Dc until the end (14)
Row 2: ch1, dc across (14)
Repeat row 2 until it makes a square (same height as width) – I used 14 rows total)
Tip: Make sure it’s a square by folding the crochet piece in half. If it makes a triangle where both sides are even, you have a square! If the sides aren’t even, you will need to make more/take some rows apart.
One of them, fasten off. The other square, don’t fasten off!
Make a Rectangle:
This rectangle will eventually make a circle on the bottom of the hat that actually goes around the head (like on a real gradutaion cap)
Start by chaining 5.
Row 1: in the second chain from hook, dc. Dc until the end (4)
Row 2: ch1, then dc across (4)
Rows 3-34: repeat row 2
Tie off, and leave a long tail for sewing.
Tassle
ch 46, and tie off, leaving a short tail.
Modify this pattern to any size:
For the squares, chain until you have the length you want. Then dc across until the rows are as long as the width, making a square.
For the rectangle, repeat the rows until when curling it into a circle, it goes almost to the edges of the squares. Keep in mind, the bigger you make the graduation cap, the wider you’ll want the rectangle! (So you might want to start with more chain)
Actual graduation cap size if you’re wanting to make one to fit a human head are about 9.25 inches or 24cm for the crown (square) part.
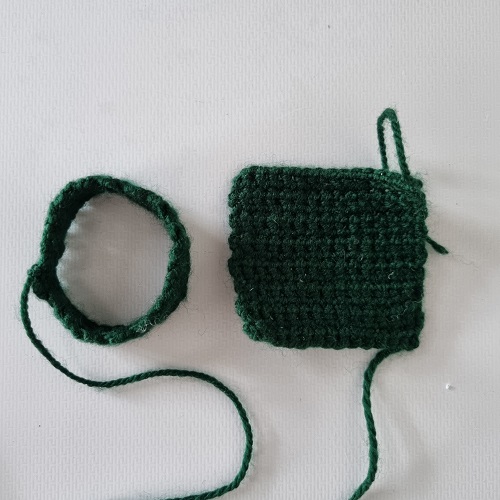
Put the pieces together
Fold the rectangle, making sure it’s not twisted. Sew the short ends together. Then pin this onto one of the squares you’ve made, centering it. Sew it on.
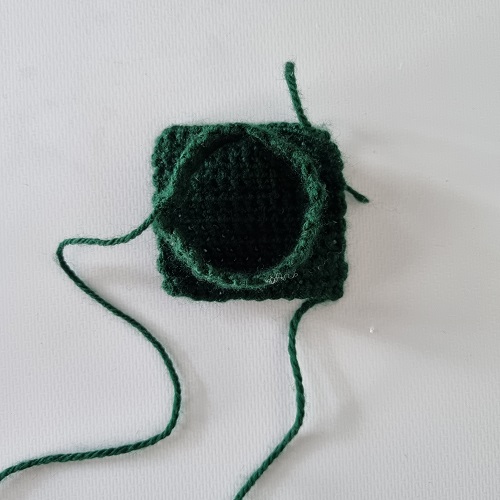
Cut out a piece of cardboard/plastic to about 1cm smaller than the squares you’ve crocheted. Put this between the two pieces, and either pin together or use stitch markers to hold the pieces together.
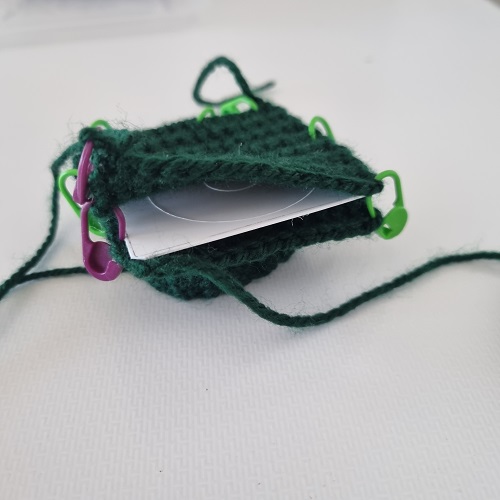
Slip stitch around the edge to connect these squares.
Weave in any ends. Now add the tassel, by threading it through the center of the top. Tie it in a double knot at the top. Optional: unweave the ends of the yarn at the ends of this to give it more of a tassel look.
And now you have a finished mini crochet graduation cap!
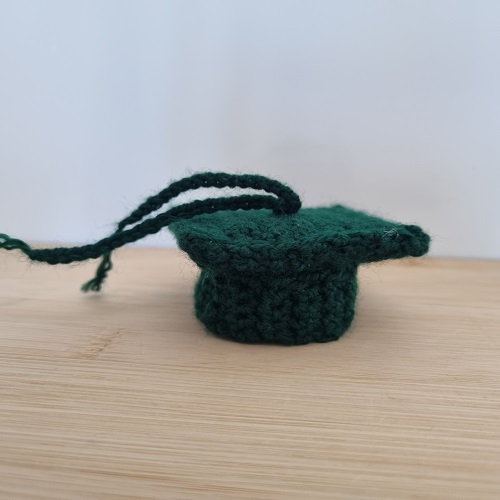
If you want to keep it in place, you can use bobby pins, either by pinning through the circle at the bottom, or through the middle, depending on what you’re putting this on.
Add this pattern to your Ravelry Notebook!
